
Gone are the days when you have to wait for paper checks to arrive in the mail. Let’s take a look at how to get paid online. You can add a payment page to your WordPress website and Cart66 will handle everything including payment security. If you have repeat clients, they can even save their billing information to make future payments even easier.
Accepting Invoice Payments
If you are using QuickBooks, Quicken, Freshbooks, or any other invoicing system, you can use Cart66 to let your clients pay your invoices on your website. Just make a page on your website like http://yoursite.com/pay and put a Cart66 payment form there to collect your clients invoice number and payment amount. Here’s how it works.
Creating Online Payment Forms
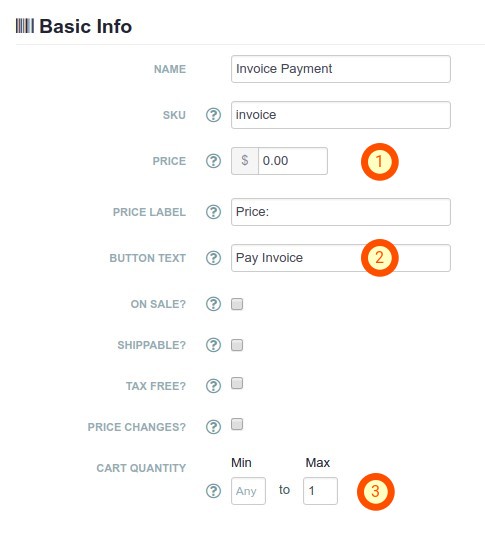
To create a product, just give it a name, SKU, and price. Since you’re going to ask your clients to enter the amount to pay, set the price to $0.00 and then configure the price as a user defined price.
Let’s put a couple tweaks on the product to change the button to read Pay Invoice. We’ll also force the cart quantity to have a maximum value of 1. This is just to ensure that your client doesn’t accidentally pay the invoice more than one time. Another way to ensure that your client only pays for the invoice once is to enable Buy Now mode which we’ll look at in a moment.
The three things to note about the product so far are:
- The price is set to $0.00 so the client can enter the payment amount
- The button on the payment form says Pay Invoice
- Only one invoice can be paid for at a time
Getting The Invoice Number
Now, we need to get your clients invoice number so we know how to apply the payment. So, add a required text field to your payment form.
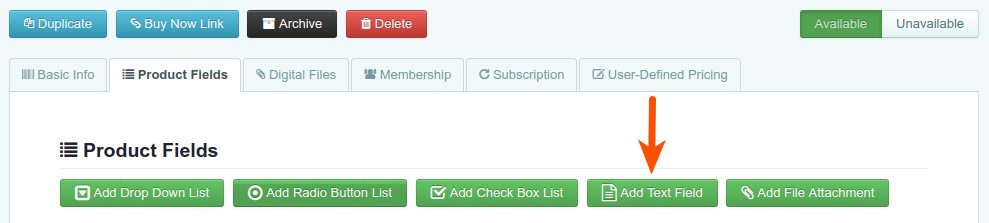
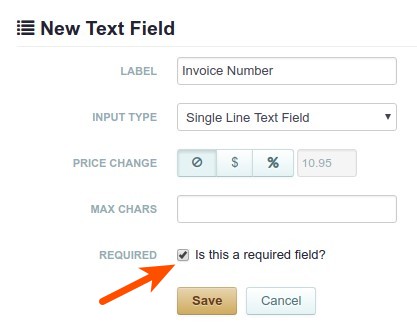
To collect the invoice number we’ll want to set three things:
- Set the label to Invoice Number
- It’s a single line text field (as opposed to a multi-line text area)
- We require the invoice number to be provided
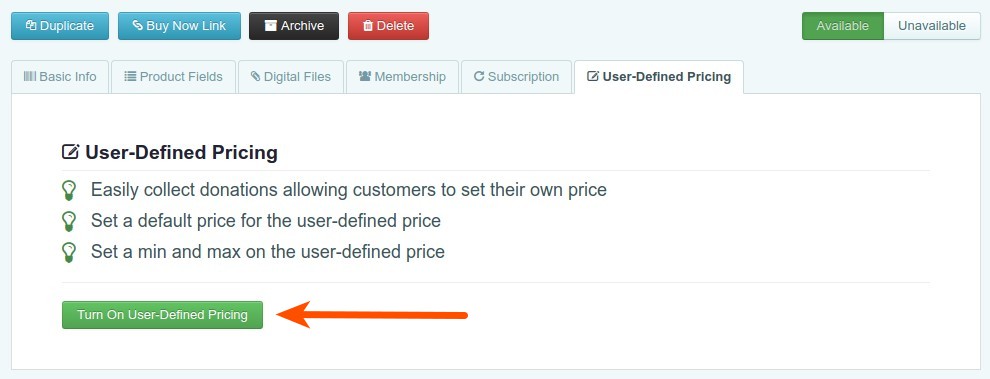
Enable User Defined Pricing
Now let’s enable user-defined pricing so that your client is able to enter the amount of their invoice.
Get Paid Online
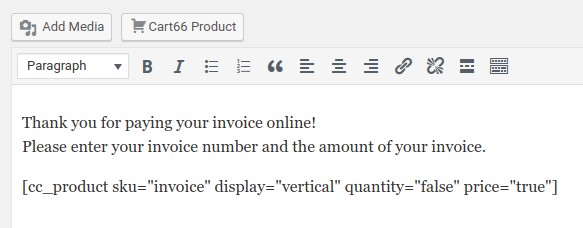
The last step is adding the invoice payment form to your website. Log in to your WordPress dashboard and create a page where you’d like to include your invoice payment form. In this example, I created a new page called Pay, but you could just as easily add this payment form to an existing page like your Contact page.
Click the Cart66 Product button and select the new Invoice Payment product.

Select the Invoice Payment product you just created in your Cart66 Cloud Dashboard and hide the quantity field since quantity is limited to one.
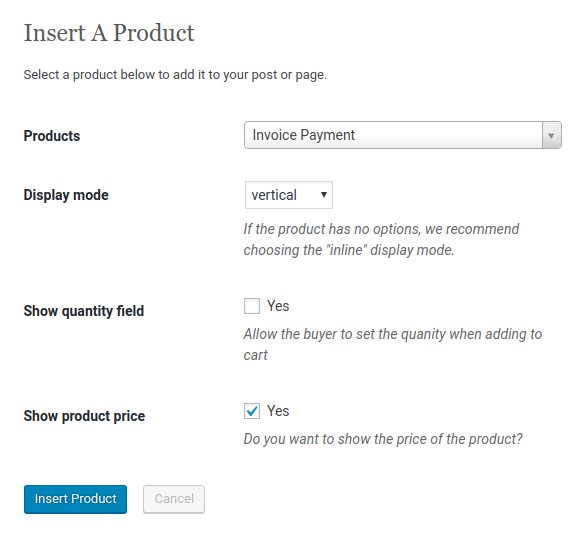
Click the Insert Product button and the Cart66 shortcode will be added to your page. Feel free to include some brief instructions or a message to your client on the page as well.
This is just an ordinary WordPress page so you can have pictures, video, or anything else on the page you’d like. So, for example, you could have a little video of yourself thanking your client for working with you if you wanted to.
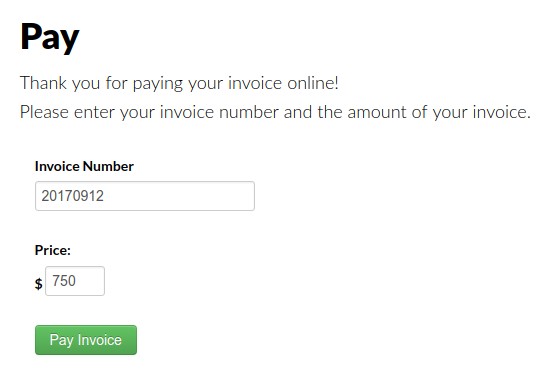
Your payment page will look something like this.
Now, when you go to your payment page, you will see your payment form.
Accepting Online Payments
Cart66 comes bundled with over 100 payment gateways and includes everything you need for PCI compliance and payment security. So when your client clicks Pay Invoice they can be assured that you are serious about serious about keeping their payment information safe and secure. You can include the Cart66 Secure Site Seal to your clients that you’re serious about security.
Cart66 Site Security Seal
Your Cart66 account comes with an interactive site security seal like this one.
Quick Review
Here’s a quick review of the steps you took to get paid online by your clients.
- Create an Invoice Payment product in your Cart66 Cloud dashboard
- Add a required text field to collect your client’s invoice number
- Set the product price to User Defined Pricing
- Create a
/paypage on your WordPress website with your Invoice Payment product
Now, when you send invoices to your clients you can include a link to your /pay page and invite them to pay securely online. You can put this link in your invoices, in your emails, on your Facebook page, or anywhere else you’d like.
That’s 4 easy steps to get paid online!
You Might Also Like…
To learn how to grow your business selling monthly WordPress support/maintenance plans.