Category: How To

Moving From Cart66 Pro to Cart66 Cloud


Cart66 Cloud brings a suite of secure, connected services to WordPress that takes ecommerce to a level that cannot be achieved through plugins alone. For example, all credit card payments are PCI compliant thanks to the secure hosted payment page that comes with your Cart66 Cloud account. You also get a business class email service, secure file storage (if you want to sell digital files), a built-in recurring billing engine, and everything works with over 100 built-in payment gateway integrations. Let’s take a look at the five steps to Cart66 Cloud.

Why Can’t I Just Auto-Upgrade?

Ok, so the first question you might be asking is, “Why is this not an automated process?” There are several parts to this answer.

Product Format Enhancements

Cart66 Pro includes a variety of ways to define products. Products can be defined as basic / native Cart66 Pro products. Or, if you wanted to have more than two options for your product, you could use Gravity Forms to build your product order forms.

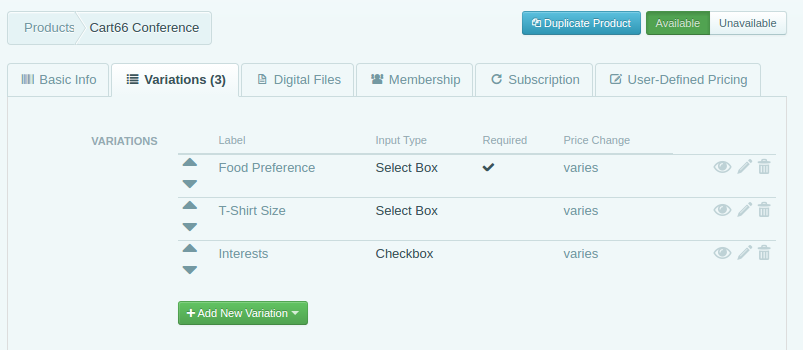
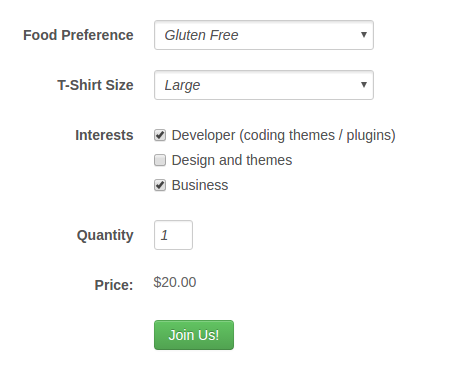
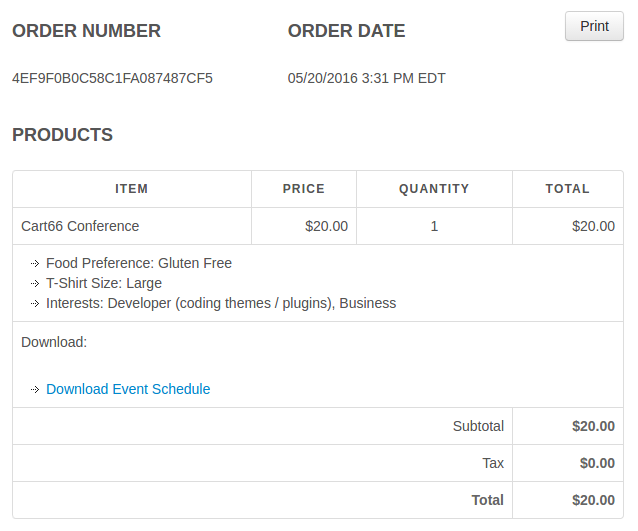
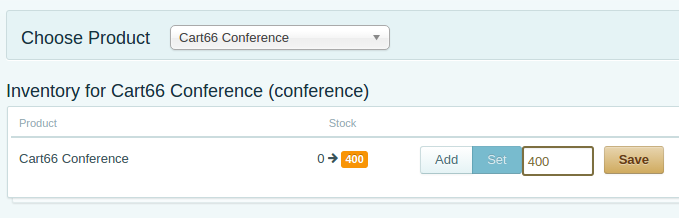
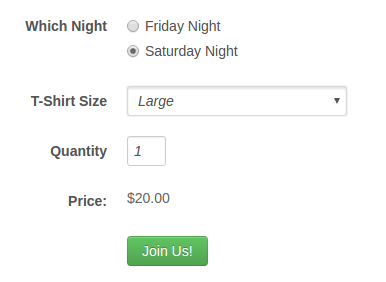
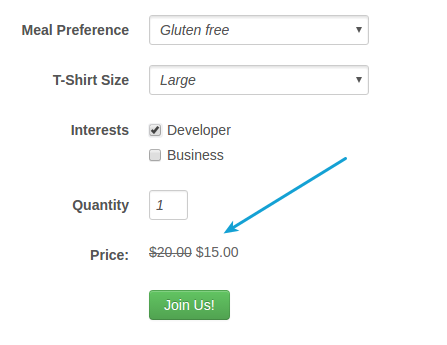
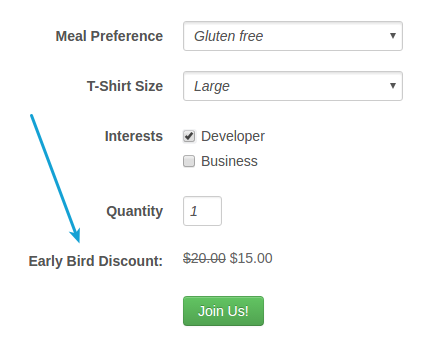
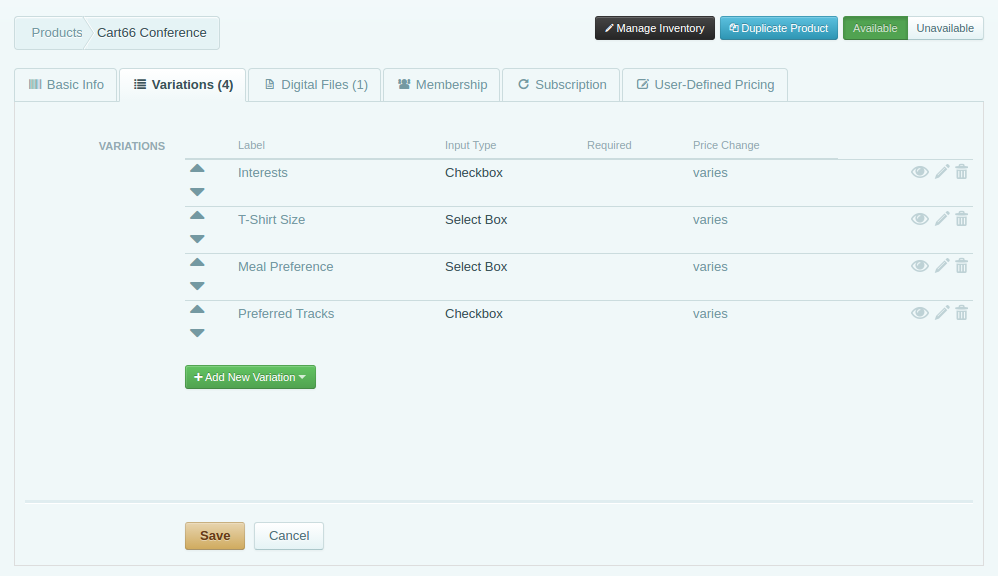
Cart66 Cloud simplifies the entire process. Now, you can build products, directly in Cart66 Cloud, with as many product options as you want. You can also track inventory on the individual product options. For example, if you want to sell event tickets to your conference, you can collect all the information in the product order form like meal preference, t-shirt size, and preferred tracks at the conference.

cart66-product-variations

With these enhancements, it was not possible to migrate Cart66 Pro product definitions into Cart66 Cloud. The underlying structure of the products is dramatically different.

Shipping Enhancements

Cart66 Cloud offers enhanced shipping features with the introduction of shipping modes.

cart66-shipping-modes

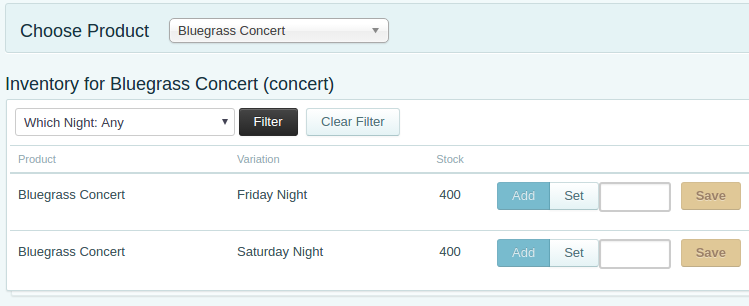
Cart66 Cloud utilizes the same workflow as Cart66 Pro with shortcodes, but adds a bunch of new features for creating order forms with unlimited product options. The options can dynamically change the price of the product. You can track inventory on the product options too.

Tax Enhancements

Collecting tax can be a really tricky thing. Depending on where you need to collect tax, there may be multiple tax rates and those tax rates may even interact with each other. For example, if more than one tax rate applies, then the second tax may replace the first tax, add to the first tax, or even be a compounded tax where you actually charge tax on the tax! Crazy, right?

We got so many different requests for ways to collect tax so we dramatically enhanced the tax system in Cart66 Cloud. We also include Taxamo integration to collect VAT tax on digital products.

Bottom Line

Cart66 Cloud includes so many new features and enhancements that if we simply ported over the data from Cart66 Pro, additional data would still be needed to make sure everything was set up properly.

Getting Things Set Up

There are five steps in getting your Cart66 Cloud account setup.

  1. Define you products
  2. Configure shipping
  3. Configure taxes
  4. Update your shortcodes
  5. Connect your secure payment page

Cart66 Cloud Products

Cart66 Cloud secures the names, prices, and variations for your products as well as the shopping cart itself. This prevents hackers from being able to hijack your shopping cart or change the price of your products. Note, however, that all the product descriptions and images are in WordPress. So, you do not have to re-create your product pages in WordPress.

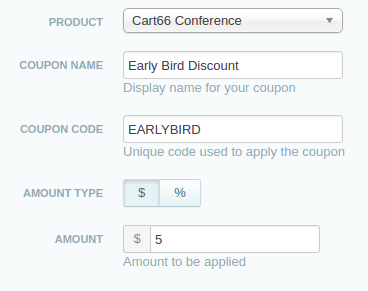
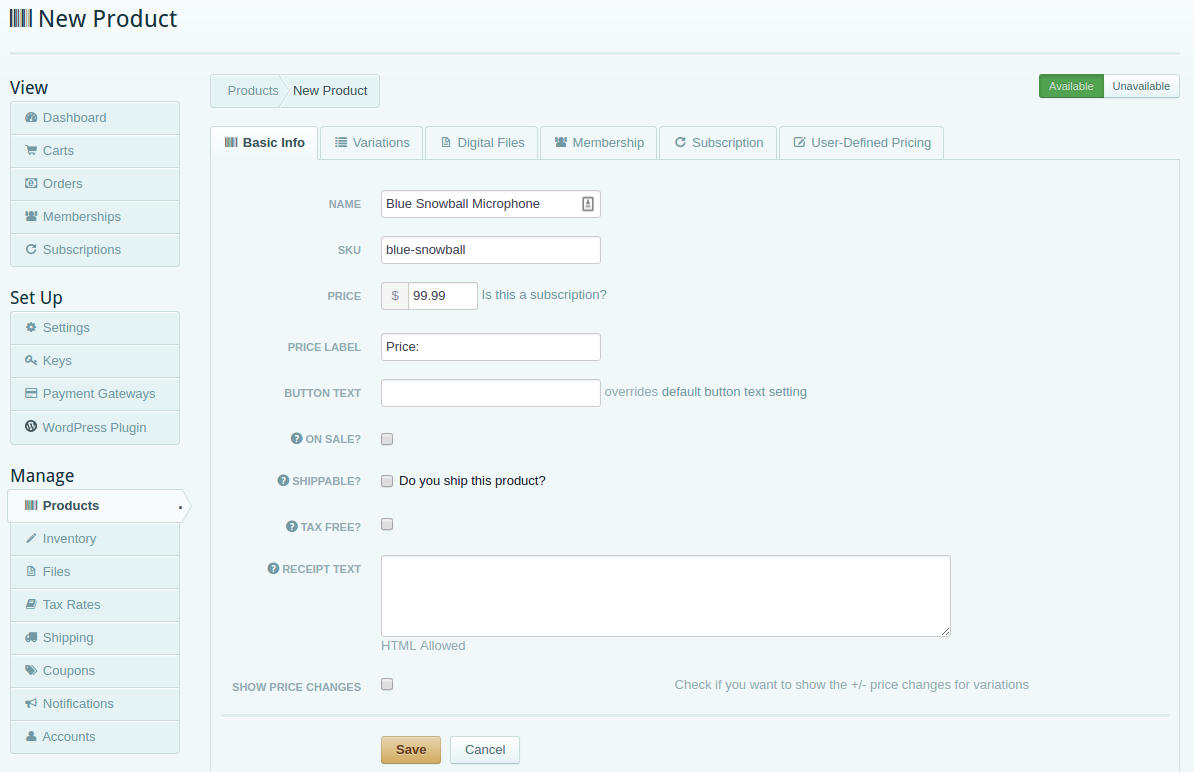
Creating your products in Cart66 Cloud is really quick and easy. You just enter the names and prices of the products. If your products have complex options, you don’t need Gravity Forms anymore, you can define all the variations directly in Cart66. You can create a product in Cart66 Cloud in less than 5 seconds.

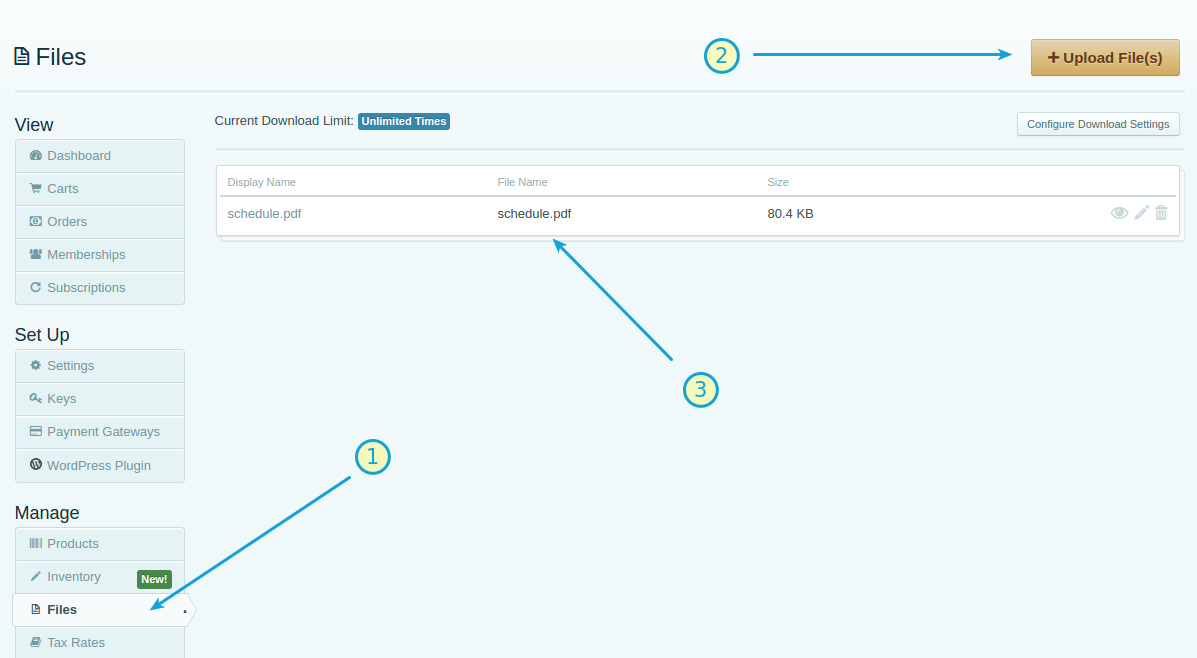
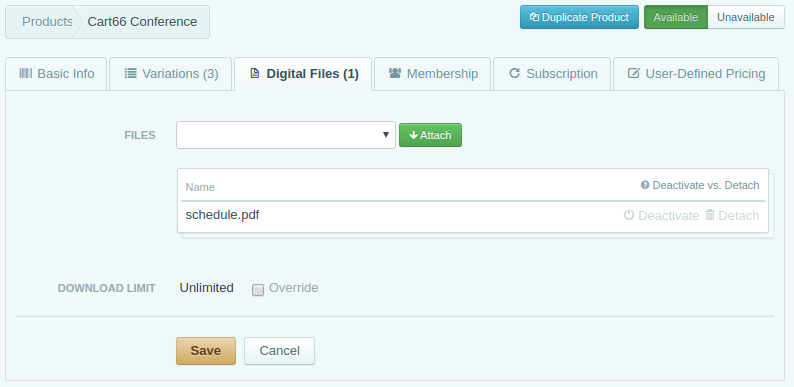
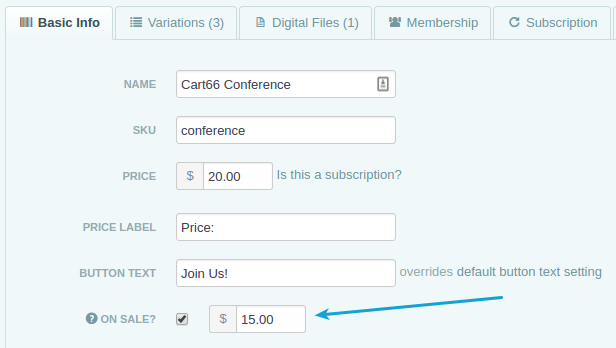
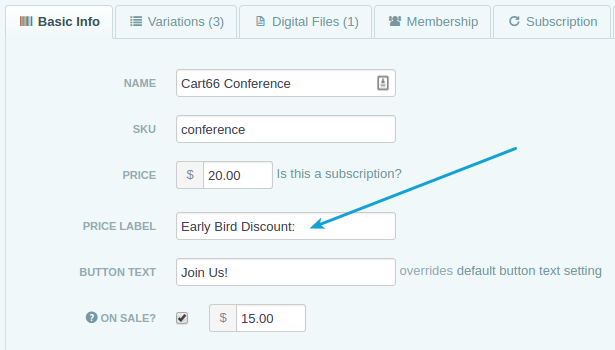
Here is the Cart66 Cloud product form for creating and editing products. Basically, you just type in the name and price and click save. Of course, you can attach files, and define variations for your products too. But you don’t have to enter in product descriptions or upload images or anything like that. You will just update the shortcode on your WordPress site and WordPress will pull in your new Cart66 Cloud “Add to Cart” button (or product order form if your product has options.)

cart66-create-new-product-form

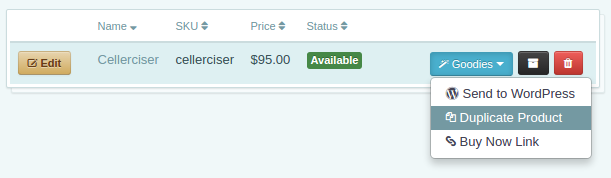
Duplicating Products

As you are setting up products, if you have several similar products, you can duplicate a product to save time. Just click the Goodies button and Duplicate Product.

duplicate-product

Shipping

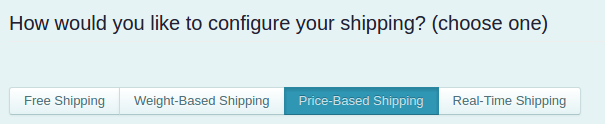
Cart66 Cloud provides a bunch of shipping enhancements by offering the following shipping modes:

  • Free Shipping
  • Weight Based Shipping
  • Price Based Shipping
  • Real-Time Shipping Quotes

Regions are the underlying idea behind both shipping and taxes in Cart66 Cloud. A region can be any geographic area you’d like. It can be as broad as an entire country or as narrow as single postal code. For example, if you are in the United States, you could set up “South East” region that includes the states Virginia, North Carolina, South Carolina, Georgia, and Florida. You could then set up a region for the North East, West Coast, South Central, etc.

The regions can be as broad or as narrow as you’d like. This gives you great flexibility for defining your shipping rates.

Once you have set up your regions you can then establish the methods (like Ground, 2 Day, etc) and the rates. The rates represent a combination of the methods and the regions. For example, you might charge $10 for Ground shipping to the South East region. Also, if you don’t ship to a particular region, you can exclude them.

Both weight-based and price-based shipping modes are based on regions.

If, despite a warning on losing sales with real-time shipping quotes, you would like to have shipping costs calculated at checkout, you can enable Real-Time Shipping mode.

Configuring Shipping Methods and Rates

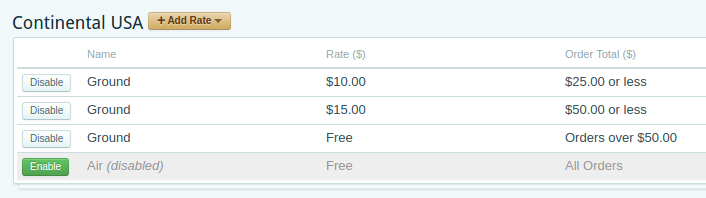
By default, you will see a couple regions, and methods set up. For example, you start off with Continental United States and a region and Ground as a method. Then, you just set up the rates you’d like to charge.

In this example, we have Price Based shipping enabled, but both price based and weight based work off the step ladder principle. Starting at the bottom (from $0.00) you introduce pricing steps. The last step includes the price you set and all orders with a price higher than the last step. In other words, there’s an open ceiling.

As you set up the rates for the methods, it will look something like this.

cart66-shipping-rates

Note: Since you are defining your own rates and regions, it is not tied to any specific shipping carrier. So, you could use FedEx, USPS, UPS, or any other carrier to send your Ground packages.

Configuring Taxe Rates

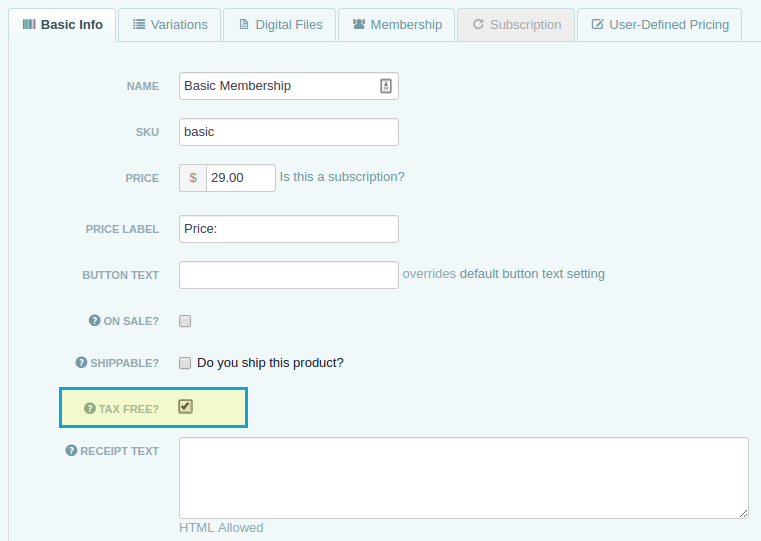
Tax Free Products: You do not have to collect tax on every product. As you are setting up your products, if you don’t want to collect tax for that product you can exclude it from taxes like this:

tax-free-product

To collect tax on a sale, you set up the region where you want to collect tax. Then you set up the tax rates for that region. You can set up multiple different tax rates for the same region. For regions with multiple rates, you specify how the rates interact with each other.

Sales Tax Example

Here is an example of setting up a 5% sales tax for Virginia.

sales-tax-example

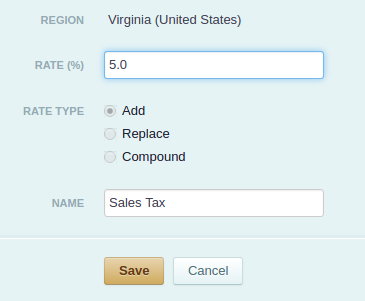
This tax is added to the order. In some places, there are taxes where one tax rate replaces another tax rate. Other times tax rates are compounded. Cart66 provides settings so you can control how multiple tax rates interact with each other. When an order is processed all the applicable tax rates are calculated from the top down.

Updating Product Shortcodes

Cart66 Cloud works almost exactly like Cart66 Pro / Lite in the sense that you can place Add to Cart buttons (and product forms) anywhere on your site with a shortcode. Cart66 Cloud introduces additional features to control the display and layout of the product forms, but the general idea is exactly the same.

Cart66 Pro uses shortcodes that look like this

Cart66 Cloud uses shortcodes that look like this
[cc_product sku="<product-sku>"]

Cart66 Cloud offers a few other options for choosing the layout of the product form and whether or not you want to show the quantity field, but the format is very similar. To make things even easier, you can use the same product-sku in Cart66 Cloud as you had in Cart66 Pro.

To change a Cart66 Pro shortcode into a Cart66 Cloud short code, all you have to do is:

  1. Change the name of the shortcode from add_to_cart to cc_product
  2. Change the item attribute to sku

Secure Hosted Payments

The last step in the process is connecting your WordPress site to your secure hosted payment page. Cart66 Cloud is the only WordPress ecommerce solution that brings security and PCI compliance to you right out of the box. You don’t even need your own SSL certificate because Cart66 Cloud’s hosted payment page provides all the security for the credit card transactions. Here’s how it works.

Cart66 Cloud has built-in support for over 100 different payment gateways as well. So there is no need for you to buy any add-ons to connect with your payment gateway. Learn more about your Secure Hosted Payment Page.

More Information

We have a bunch of great resources to help you get started and your support team is there to help you also. Here are a few links to help you find the information you need.

Video Tutorials: Complete tutorials including video along with written instructions to get the most out of Cart66 Cloud.

Here are a few links to the most popular tutorials:

Cart66 YouTube Channel

You’ll find even more videos about WordPress, ecommerce, and growing your online business in the Cart66 YouTube Chanel.

Cart66 YouTube Channel

WordPress Event Registration Plugin

https://www.youtube.com/watch?v=WLMMG7Sl0bo

If you are looking for a WordPress event registration plugin, take a look at Cart66. Yes, Cart66 is a great tool for event registration because you can create your registration form and collect as much information as you need. Unlike other WordPress event registration plugins, Cart66 comes with everything you need to handle the entire process from selling tickets, including additional files with the order (like the event schedule), limiting the number of tickets you sell, and collecting payment. In addition, Cart66 takes care of all the security and PCI compliance for you so you can accept credit card payments without any hassle. Let’s take a look at how it all works.

Why Cart66 Is A Great WordPress Event Registration Plugin

Cart66 is different from other WordPress plugins because, in addition to a WordPress plugin, you also get a suite of hosted services that go beyond what you can do with a plugin alone. For example, Cart66 works with over 100 different payment gateways, has built-in inventory tracking so you can keep from overselling your event, and includes a hosted payment page so you can securely accept credit card payments without having to worry about all the technical issues related to securing an ecommerce site.

What To Look For In An Event Registration System

When you are selling tickets for an event, there are certain things you want to make sure you can do. Here’s a list of features you’ll want to look for in any event registration system – whether it be for WordPress or any other platform.

  • Collect custom information on the registration form
  • Include downloadable material for people who register
  • Limit the number of people who can register (so you don’t oversell the event)
  • Sell multiple types of tickets for different prices
  • Offer coupon codes
  • Set an early bird discount / sale price
  • Connect with your email newsletter
  • Securely collect payments
    • Accept credit card payments
    • Accept payments through PayPal

Cart66 includes all of these features. Let’s take a look at each one and how it works in Cart66. You will see how Cart66 is more than just a WordPress event registration plugin – it is a complete, comprehensive event registration system.

Event Registration Form

Sometimes you just need to sell a ticket and you don’t need any additional information from the person attending the event. In that case, you can have a simple “Buy Now” button to let your attendees purchase their tickets. Other times, your event has some details and options that require some input that you need to collect during on your event registration form.

Suppose you are hosting a conference, maybe something like a WordCamp, that spans two days, involves lunch, you give out a t-shirt but need to know what size the person wants, etc. You will want to create an event registration form that asks all of those questions and collects that information. It’s not complicated to do and it’s all built right in to Cart66. You just create a product and treat the additional information you need to collect as variations of the product.

In Cart66, product variations can be multiple choice – like radio buttons or drop down select boxes, or you can have check boxes to let registrants select multiple options for the same question. You can also have free form text to collect notes and other comments.

Here is an example showing a few variations for an event registration form.

event registration form options

Given these variations, the event registration form looks like this:

WordPress event registration form

Include Downloadable Files With Registration

After someone registers for an event, it is often helpful to be able to get additional information to the attendee such as the event schedule. If you have the schedule in a PDF, you can easily attach that file to the event registration form so that when someone registers for the event, they will get a link to download the event schedule (and any other files you want to include).

Just upload the event schedule into the Files section of your Cart66 Cloud dashboard, then you can attach the schedule to your event registration form.

upload event schedule to WordPress ecommerce site

event schedule

When people register for the event, they will see a link to download the event schedule. The receipt will also be emailed to them and will include a download link as well. The receipt will look like this:

event registration receipt

Maximum Number of Event Registrations

For most events, you can only host a finite number of people. Suppose your venue can only hold 400 people. Once you sell 400 tickets the event needs to be marked as sold out and no more event registrations may be made. Use the inventory feature in Cart66 to set the maximum number of tickets you sell.

inventory tracking for event registrations

Once you start tracking inventory for your event, you just set the inventory to maximum number of event registrations you want to permit. So, if your venue can hold 400 people, set the inventory to 400 like this:

set inventory amount

Selling Multiple Types Of Tickets

Sometimes you want to sell more than one type of ticket. For example, maybe your selling tickets to a concert and there is a performance on two different dates. You can do this in two different ways depending on your needs.

Single Form For Multiple Events

You can use a single form and allow people to pick which event they want to attend. In the example of the Friday Night and Saturday Night concerts, you can just create a product variation and have people select which night they want to attend. The event registration form would then look something like this:

Using a single form for multiple event registrations

You can still track inventory for each night. If the venue only holds a maximum of 400 people, you would set the inventory for the event registration product to allow 400 registrants for Friday night and 400 for Saturday night. It would look like this:

Tracking inventory for multiple events in one form

Of course, if you need significantly different information collected for your different events, you can just make to separate products – one for each event.

Coupons and Discounts

All of us who have planned events know how nice it is to know how many people are coming. The sooner we know that, the better prepared we can be. To help encourage people to register sooner rather than later, you can offer early bird discounts. This can be done in several different ways.

Setting A Sale Price

A simple way to handle your early bird discount is to simply put the product on sale to encourage people to sign up early. If you start advertising for your event 3 months out, you can start with your deepest sale price. Then, the next month, reduce the discount. On the last month, you can stop the sale and sell the event registration at the regular price.

The sale option is in the Basic Info section of your product.

early bird discounts for event registration

That will make your event registration form look like this:

early bird discount for event registration

If you want to get fancy, you can customize the price label to say “Early Bird Discount” – by setting that in the Cart66 Cloud Dashboard on the Basic Info tab for the event registration product.

Customize price label to say Early Bird Discount

Now your event registration form will look like this.

early bird discount on price label for event

Coupons For Discounts

Another way you might choose to incentivize people to sign up is with coupons. In your Cart66 Cloud dashboard, go to the Coupons section and create a Product Coupon for your event. The basic information might look like this if you wanted to offer $5 off.

basic information for early bird discount

There are other settings you can use to help add a sense of urgency to use the coupon. You can limit the number of times the coupon can be used. So, you could send out an email newsletter with your EARLYBIRD coupon code and say that the first 100 people to register for your event get $5 off the price. You just set the Max Redemptions  for the coupon to 100.

Or, maybe you’d rather have the deadline be a date. You could allow people to use the coupon up until a certain date by setting the To Date value for the coupon availability. This is what the coupon availability settings look like.

coupon availability restrictions for event registrations

Connecting With Your Email Newsletter

Cart66 currently integrates with MailChimp (more integrations coming soon) so you can have your customers sign up for your newsletter while they are checking out. It’s just a little checkbox on the checkout form so it’s easy for people registering for your event to stay connected with you via your email newsletter.

Event Registration Payments

One of the strongest features of Cart66 is the secure hosted payments page you get so you can safely and securely accept credit card payments. Many times people think they have to use PayPal because accepting credit card payments is too hard because of all the security and SSL certificates. Cart66 solves that problem by letting you accept credit card payments on your own hosted payment page that looks exactly like the rest of your WordPress website. By skinning your hosted payment page with your WordPress theme, you keep all the design and branding for a smooth and consistent checkout experience. Here is a quick video that shows how the hosted payment page system works in Cart66.

For more information, on how the hosted payment page works, check out this article describing the PCI compliant hosted payment page system.

WordPress Event Registration Plugin Summary

We have gone over a lot of information. The main point is that Cart66 makes a great WordPress event registration plugin because it gives you an entire platform that meets all the needs for creating and securely paying for event registration forms. You can collect all kinds of custom information, promote your event with coupons and sale prices, integrate with your email newsletter, limit the maximum number of registrations and securely accept credit card payments. Cart66 handles all the technical details of securing your payment page so you don’t even need your own SSL certificate.


Selling Product Bundles With Buy Now Links

https://www.youtube.com/watch?v=bLv14zqCfNw

Cart66 has a built-in way to create a link that, when clicked, will place a product in the customer’s shopping cart and direct them to either the view cart page or the checkout page. These “Buy Now” links are great for sharing on Twitter, Facebook, Google+, email newsletters, etc. They don’t just have to be text links, you can wrap images with these links to make your own Buy Now buttons. Now, we have the ability to create Buy Now links that add multiple products to the cart at once. This is great for selling product bundles! Let’s take a look at how to do it.

Read more

Selling Payment Plans On WordPress

https://www.youtube.com/watch?v=PQX00-6p1gY

If you sell an expensive product, you might want to offer a payment plan to your customers. With a payment plan, you can spread the cost of your product across multiple different payments. For example, if you sell a product that costs $500, you might offer a payment plan where your customer pays $100 over the course of five installments. Cart66 makes selling payment plans on WordPress easy.

Read more

Inventory Management In Cart66

https://www.youtube.com/watch?v=vy_FSjpNH74

If you sell products that you keep in stock, inventory management in Cart66 will let your customers know whether or not an item is in stock on your website. If a customer clicks the Add To Cart button and you do not have the inventory in stock to fulfill the order, your customer will see a notice saying, “This item is out of stock.”

Read more

Sell Music On WordPress With Cart66

This article will show you how to sell music on WordPress with Cart66. Right out of the box, WordPress provides some awesome tools for sharing your music on your website. You can post MP3s and WordPress will provide a built-in player. You can share playlists such as samples of your album. There are even plugins to share sheet music on WordPress so other people can learn to play your songs. Cart66 provides the ecommerce tools you need to securely sell music.

https://www.youtube.com/watch?v=8AwMkJ8nXNc

Read more

Accept Donations Online With WordPress

There is a lot of flexibility with how you can accept donations online with WordPress and Cart66. Cart66 enables you to accept monthly donations, one-time donations, and even store the billing information for donors to make it easier for them to donate again in the future. There are many different options for displaying donations as well. Let’s take a look at a few of them now.

https://www.youtube.com/watch?v=nrgkGhTejyQ

Read more

How To Send Sales Follow Up Email

Sending a sales follow up email is important because completing a sale is not (or at least should not be) the end of your relationship with your customer. One of the hardest things to do when selling a product or service is acquiring a customer. Once you have that customer it is a great idea to get to know them and continue to offer help and support for the product they just bought from you. If you are running your online business with WordPress, Cart66 provides the tools you need to stay connected with your customers.

https://www.youtube.com/watch?v=Q2XDr5AQZQI

Read more

Cart66 As Your WordPress Magazine Plugin

Cart66 is a great WordPress magazine plugin. It gives you all of the tools you need to publish your own digital magazine. You can even sell physical magazine subscriptions with Cart66 too. Enjoy features including content restriction, subscription billing for your online magazine, and subscriptions billing for your physical magazine. You can even sell multiple different levels of access to your content. Here is a demonstration of some of the features Cart66 offers for publishing your digital magazine.

https://www.youtube.com/watch?v=hgCrjYAIErk

Read more

How To Create And Use A Buy Now Link

Sometimes you want to share a Buy Now link that takes a customer directly to the checkout page with the product ready to be purchase – bypassing the view cart page. These are great for sharing in emails, newsletters, Facebook, Twitter, etc. Here’s a quick demonstration of how it works.

https://www.youtube.com/watch?v=gUNYQj_IPxs

Read more