
The Kustrix WordPress Theme is premium theme available on TemplateMonster. Also available through TemplateMonster is the free, Kustrix Lite version of the theme. The free theme does not have quite as many features as the paid version of the theme and it doesn’t come with support, but it’s still very flexible and capable theme. In this review, we’ll look at how to set up the theme, configure some navigation menus, and – perhaps most exciting – set up a secure online store with Cart66. Let’s get started!
Getting and Installing Kustrix Lite
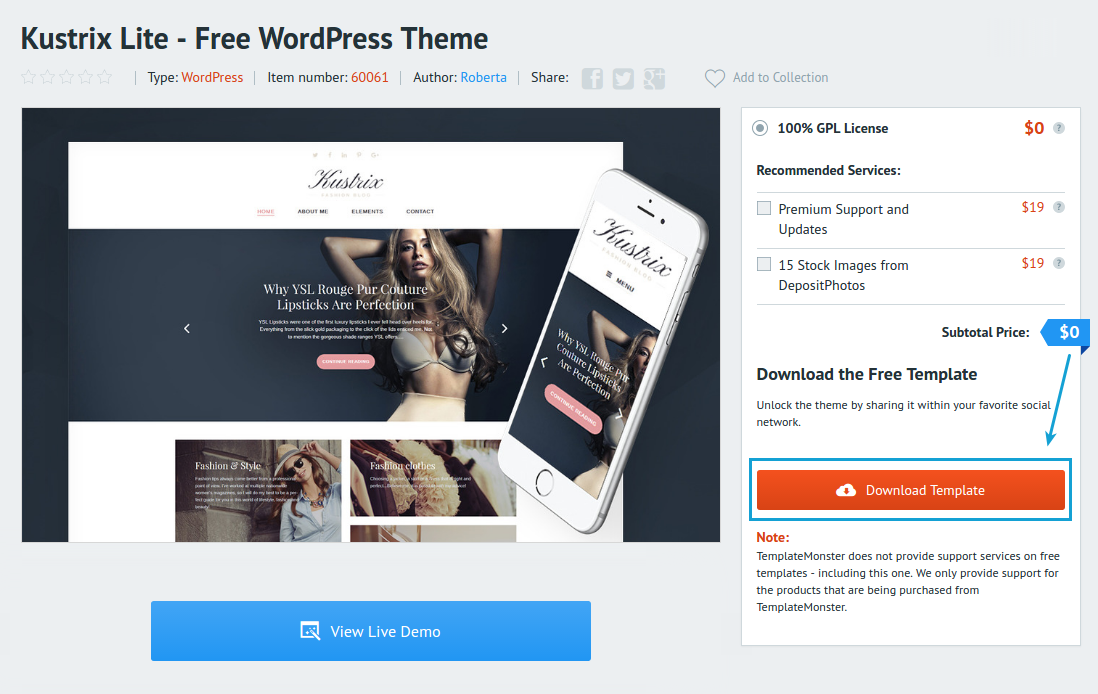
Click this link to download the free Kustix Lite WordPress Theme.
If you want to download the theme for free, uncheck the premium support and updates checkbox.

Once you uncheck the premium support and updates checkbox, you’ll be able to download the theme for free.
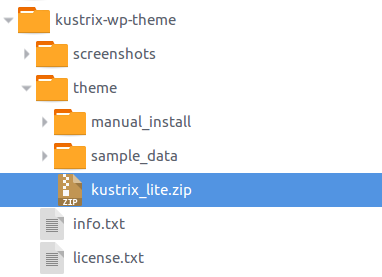
The theme will be packaged in a file.zip file that you will need to extract before you can upload it and install it on your WordPress site. The zip file you get from TemplateMonster.com has a bunch of stuff in it in addition to the WordPress theme. If you upload the entire zip file you download from TemplateMonster it will NOT install. Be sure to extract the zip file first, then upload the file called `kustrix_lite.zip`
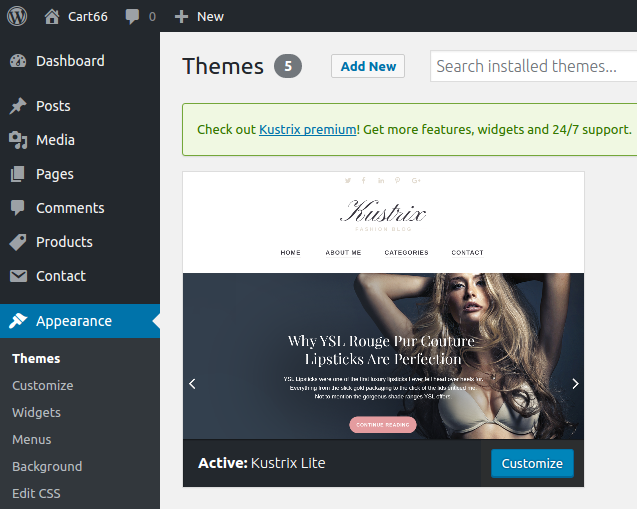
Upload kustrix_lite.zip and activate it. It will look like this. Now we’re ready to start setting things up!
Setting Up Your Store’s Homepage
You may want the main homepage of your site to be your store’s homepage. Or, you may want your store to just be one section of your site. It is really easy to set it up either way. Let’s start by setting up your store as just a section of your site. Then, if we want to, we can use our store’s homepage as the main homepage of our site. It’s nice to be able to show a set of featured products on your store’s homepage. There are a couple steps to set that up. First, create a page in your WordPress admin that you’d like to use as your home page.
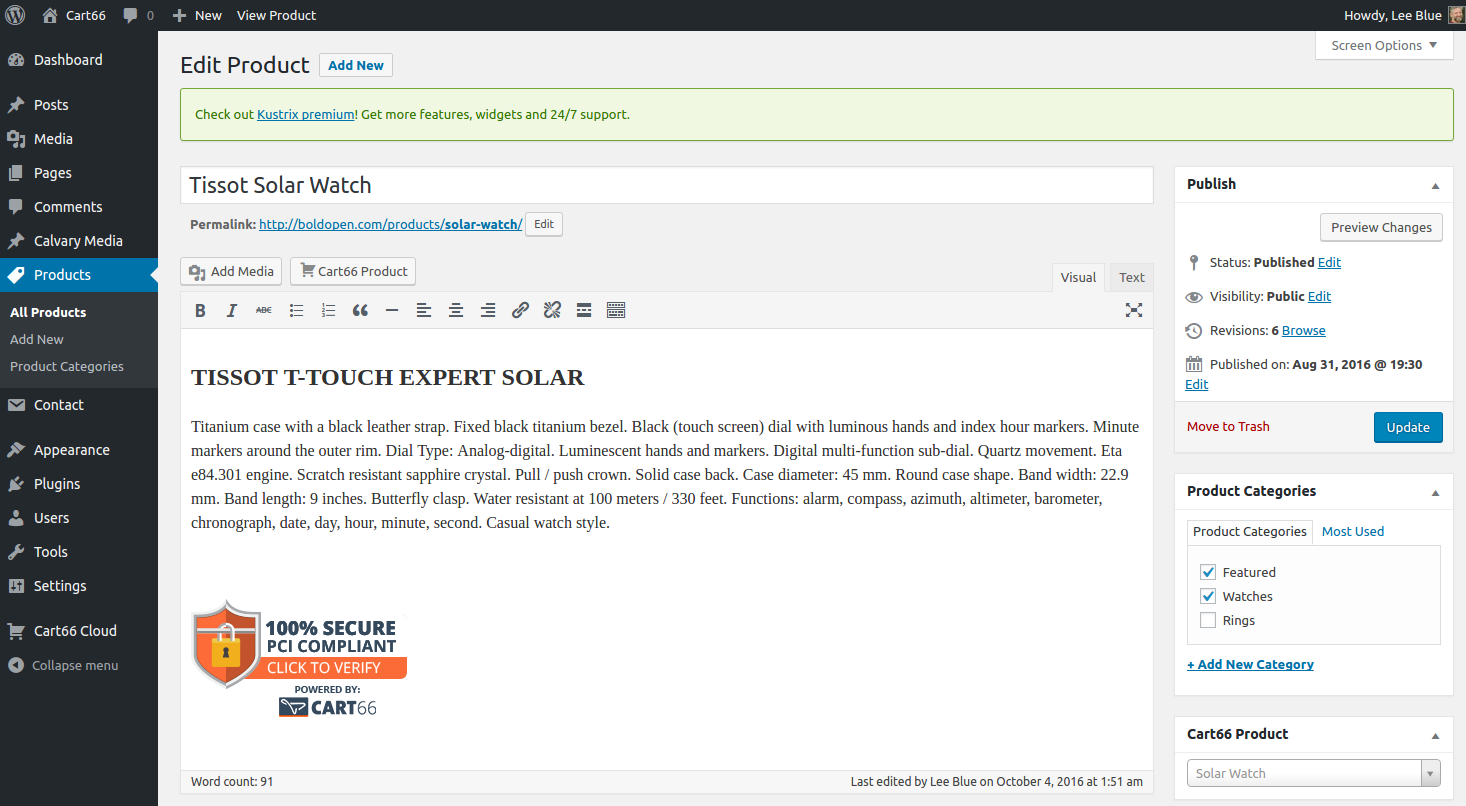
First, create a page in your WordPress admin that you’d like to use as your home page. It’s just an ordinary page, just like any other WordPress page. We’ll list our featured products on the store’s homepage using the Cart66 product catalog shortcode.
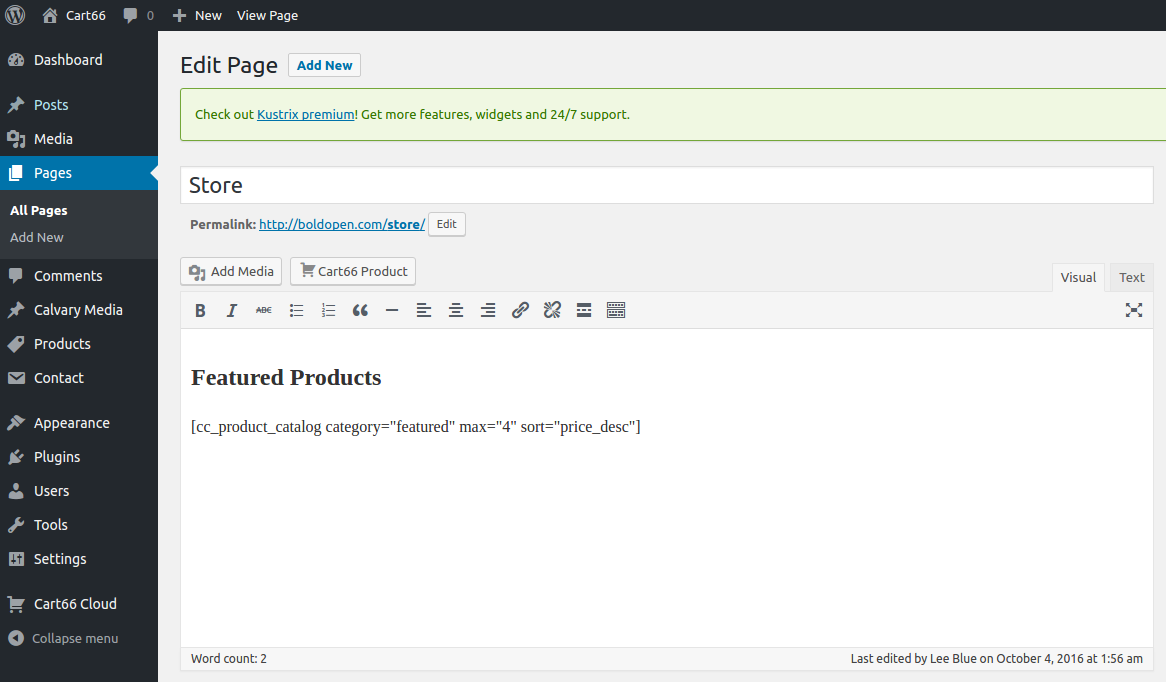
The Cart66 product catalog shortcode is a really flexible shortcode that you can use to display groups of products, or even your entire product catalog. For the homepage, we’ll list the products that we have tagged as being featured products.
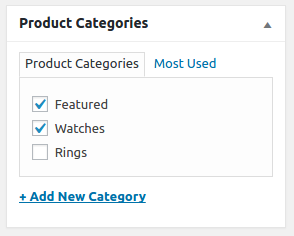
When you are creating your product page in WordPress, you can set up as many different product categories as you’d like. In our example store we will be selling watches and rings. So, we will create a product category for both watches and rings. We will also create a category called featured which we will use to organize our featured products. You can assign a product to as many categories as you’d like. So you can assign all your watches to the watches category. Then, also assign the watches you would like to list as featured products to the featured category.
Product Catalogs and Featured Products
For more information on how to set up product catalogs and featured products, take a look at these video demonstrations.
Setting Up Product Catalogs With Cart66
How To List Featured Products
Your Store’s Navigation
Keep in mind that when you are using Cart66, your product pages are just like any other WordPress page. So, you can link to them in your menu’s just like you link to all the other pages in your site. This gives you great flexibility over how and where you show links to the different products in your store.
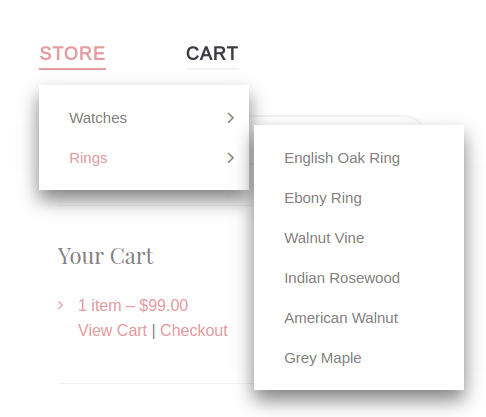
Let’s set up our navigation like this:
- Store: The store’s homepage
- Watches: A list of all the watches we sell
- Pages: A page for each watch
- Rings: A list of all the rings we sell
- Pages: A page for each ring
Once we have our product pages created, the navigation will look like this.
Setting Up Product Category Pages
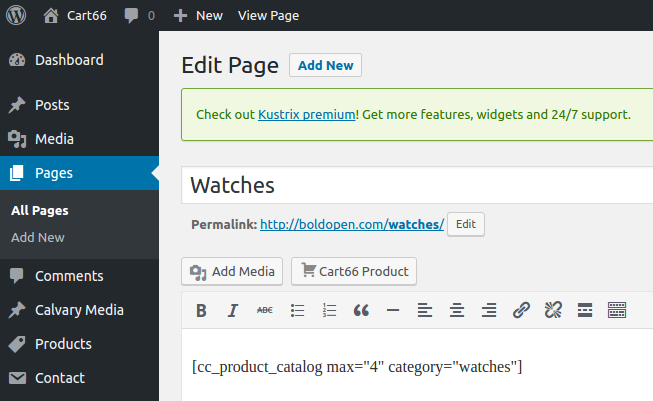
The Watches and Rings pages are both going to be almost exactly like the Store page we just set up. We will create a page and use the Cart66 product catalog shortcode to list the products. Instead of listing featured products, we will list watches on the Watches page and rings on the Rings page.
On the Watches page, type the shortcode This will list all of your watches sorted by price with the most expensive watches showing up first.
Do the same thing with the Rings page except change the category to rings. The shortcode will look like this
When you’re finished, your Watches and Rings pages will look like this.
Notice, we also set max="4" in the shortcode. That will display a max of four products per page when listing the products. So, if you have eight watches, they would be listed in two pages showing four watches on each page.

Adding Pages For Individual Products
In the same way that we just set up the page for Watches, we will also set up the page for Rings. Now, when you go to add a new ring to your store you will want to add that page to your navigation as well. Again, remember, that these pages are just like any other WordPress page so you just added the page to the menu.
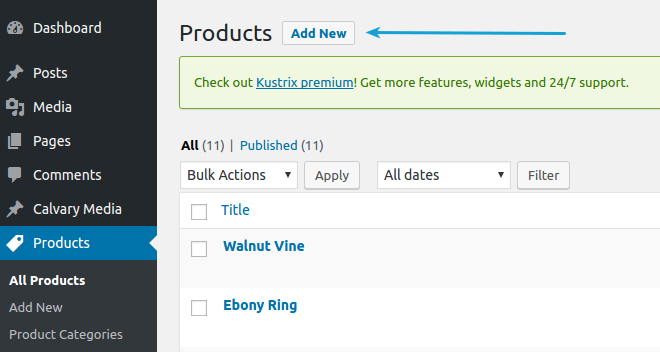
From within your WordPress admin, go to Products > Add New
Create as many product pages as you would like, then head over to Appearance > Menus
You will see a screen like this that shows all the products you have created. If you don’t see the Products meta box, click on the Screen Options tab in the top right corner and make sure Products is checked.
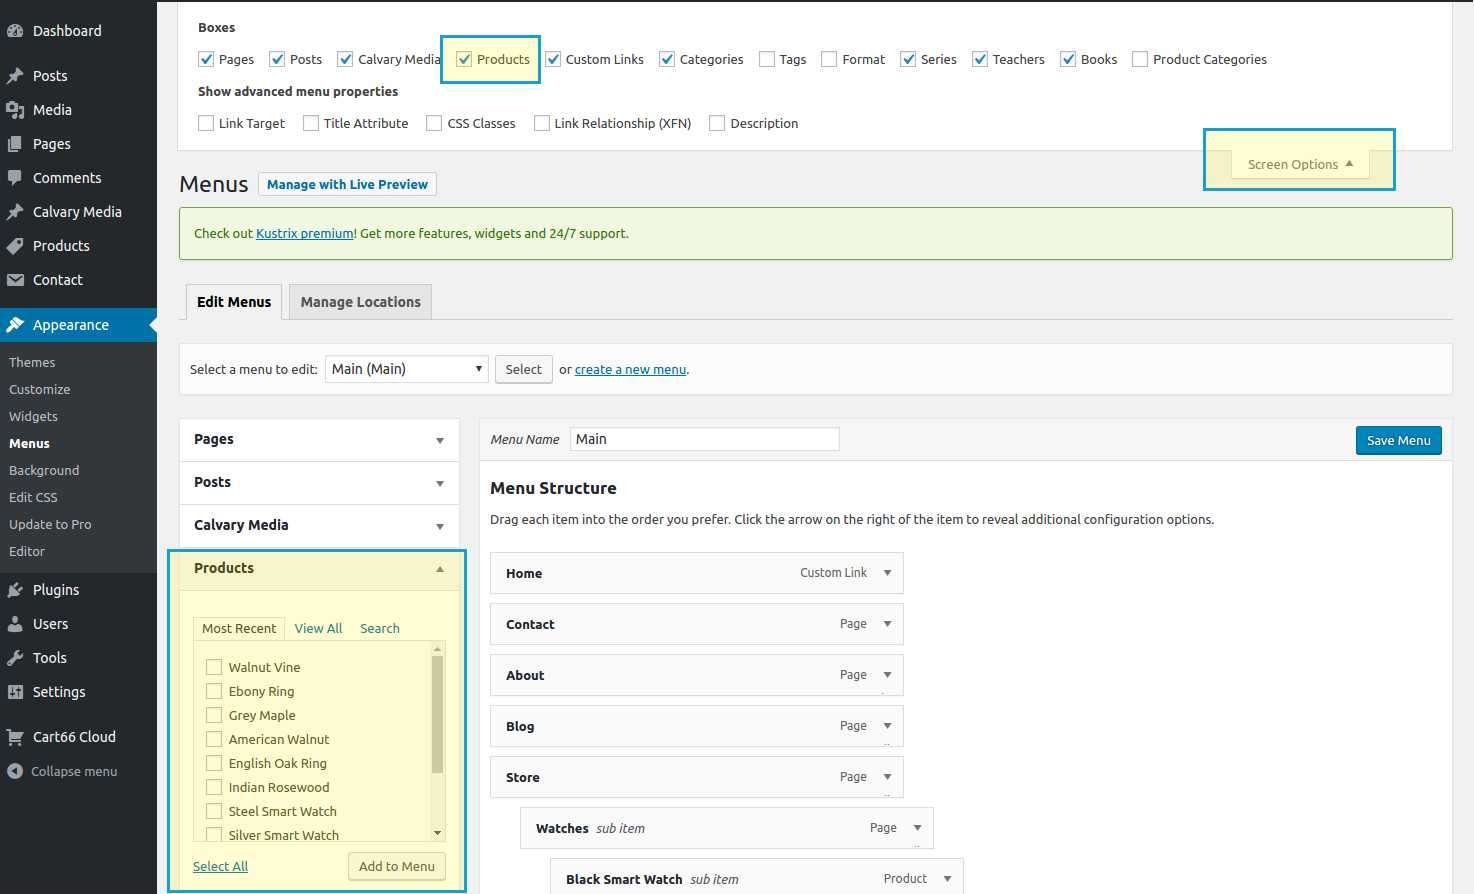
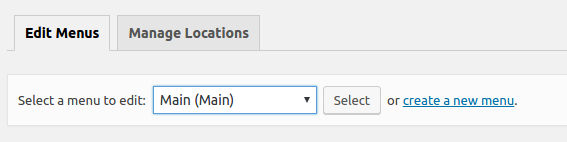
Next, select the menu you want to work with. In this case, we want the Main menu.
Now you can select the products you want to add to the menu, then click the Add to Menu button. This will place links to the selected products into your menu. From there, you can drag-and-drop them into place.
Design Your Secure Hosted Payment Page
One of the great benefits of using Cart66 is that you don’t have to worry about ecommerce security and PCI compliance. The secure hosted payment page supports over 100 different payment gateways and takes care of all the security for credit card payments. You don’t even need your own SSL certificate. Best of all, it looks exactly like your WordPress site because we use your WordPress theme to skin your secure hosted payment page in a process we call page slurp.
Get Your Slurp Template Ready
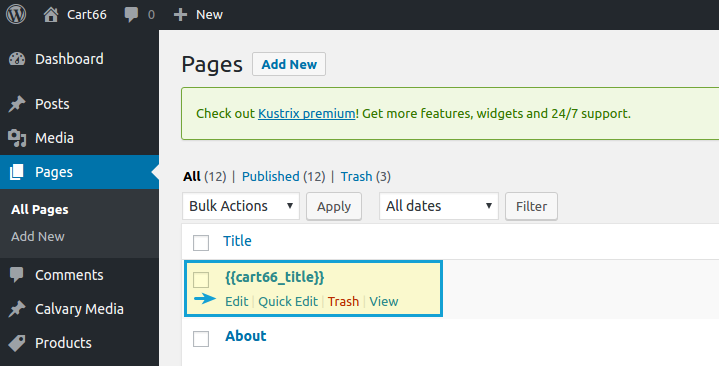
When you install Cart66, it creates a special page for you with the title of {{cart66_title}} You don’t want to have a lot of distractions on your checkout page, so it’s a good idea to set your page slurp template to use the layout that does not have a sidebar. In your WordPress admin, go to Pages > All Pages and click to edit the {{cart66_title}} page.
Select the page template that does not have any sidebars.
Do The Slurp
Page Slurp is what we call the act of cloning your WordPress theme on to your secure hosted payment page. It is a one-click process that pulls in the design and layout of your WordPress theme so you get a clean, consistent experience throughout the checkout experience.
To get you secure hosted payment page looking like the rest of your WordPress site, sign in to your Cart66 Cloud dashboard and navigate to Customize > Checkout Page.
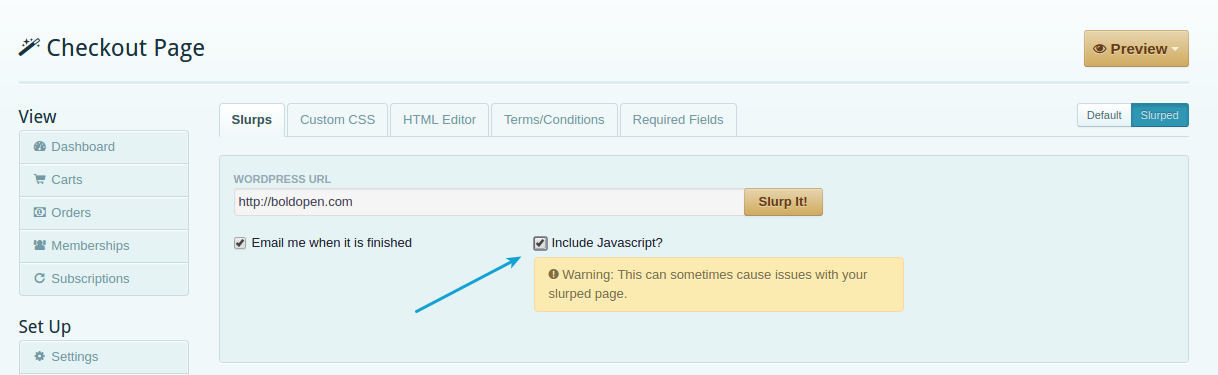
From there you will see the Slurp It! form. The WordPress URL should be the domain name of your WordPress site. It should NOT be the direct URL to any particular page on your site. So, if you site is located at http://my-great-site.com then that’s the value you should see in the WordPress URL field. This value is set in the Cart66 Cloud dashboard under Setup > Settings.
The Kustrix theme includes a Javascript loader script. As the page is loading the content you see a little spinner. For this reason, you need to select the checkbox to include Javascript in your slurp. When everything looks good, click the Slurp It! button.
The slurp will take a couple of minutes to finish. It is upload all the HTML, CSS, images, etc. from your WordPress theme. You will get an email notification when the slurp is complete.
Tweaking The Slurped HTML
After you slurp the Kustrix theme, if you don’t have an SSL certificate on your WordPress site you need to make two quick tweaks to make sure you get the secure, SSL lock on your checkout page. The Kustrix theme references two assets from your WordPress site over http which will cause a mixed content warning and prevent the SSL lock from showing up. If your WordPress site does have an SSL certificate, you can skip over these next two steps.
Removing The Search Form
If you don’t have an SSL certificate on your WordPress site, you will want to remove the built-in search form from the slurped HTML content. To do that, sign in to your secure Cart66 cloud dashboard at https://manage.cart66.com
Navigate to Customize > Checkout Page > HTML Editor
Then you can do a quick search (press ctrl + f) and find “action=”. That will take you to the search form that you can delete.
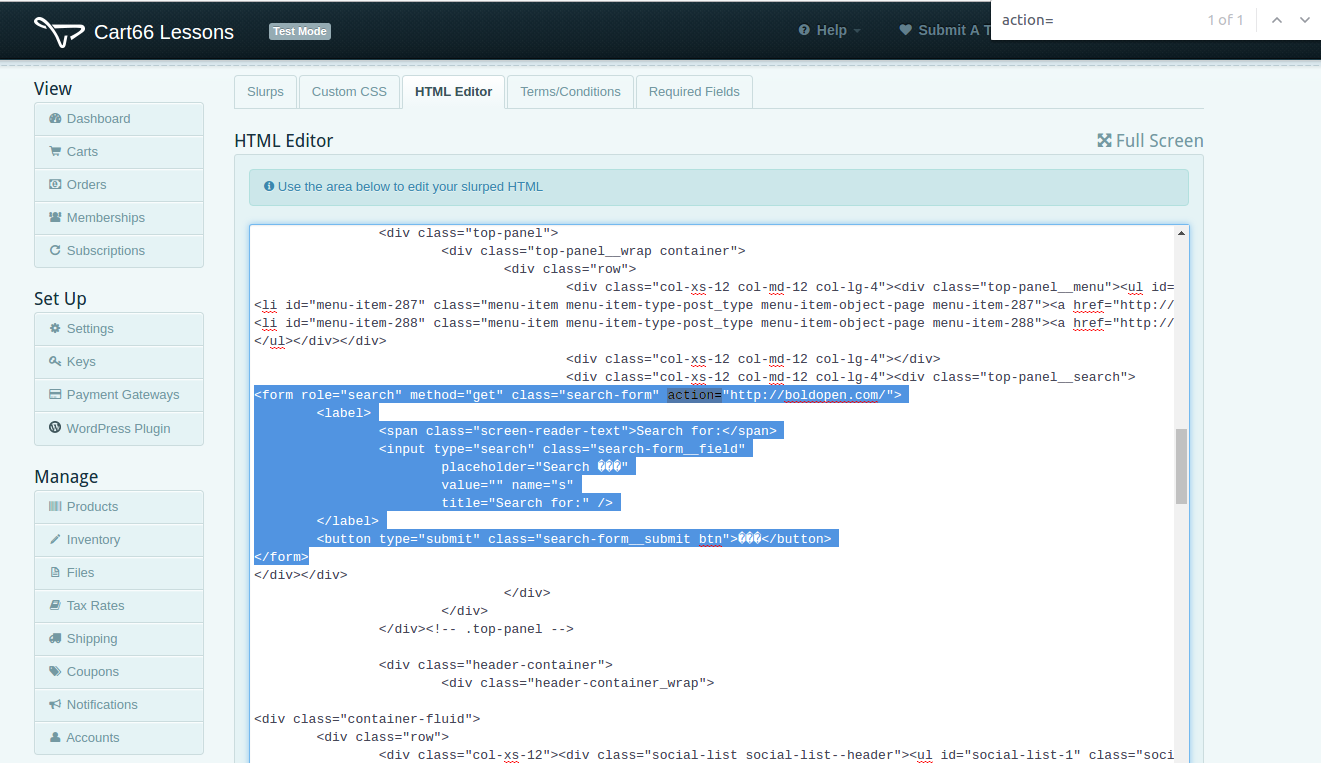
Delete the code highlighted in this image starting with the opening <form…> tag and ending with the closing </form> tag.
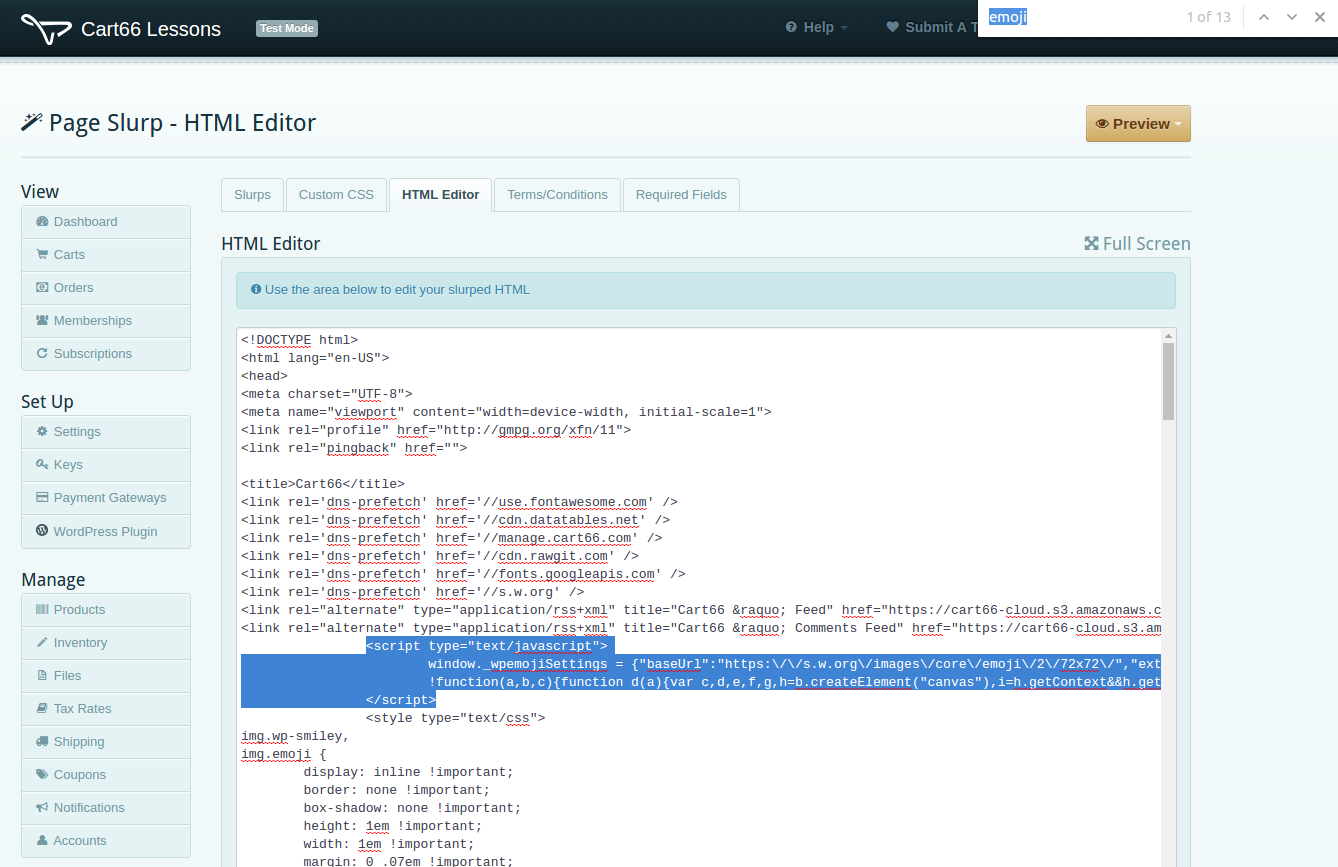
Remove Emoji Javascript
The second thing to remove is the emoji Javascript which is making a call over http causing the mixed content warning. In the same way that we searched for the action attribute to locate the <form> tag, now search for emoji to locate the Javascript code to delete. It will look like this.
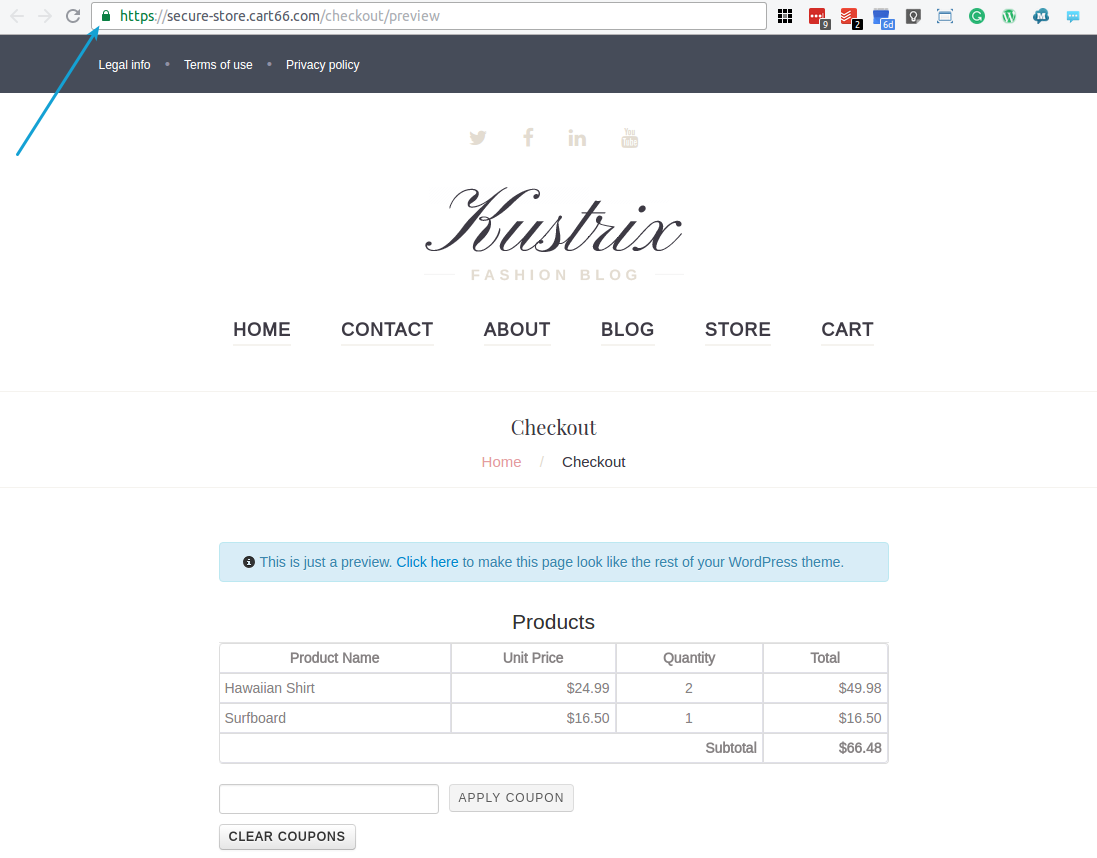
Your Secure Checkout Page
After making those two, quick tweaks, you now have a secure and PCI compliant checkout page that looks exactly like your WordPress site. It’s got the same theme, the same navigation, etc. As you can see in the screenshot below, you have the secure SSL lock showing that the page is secure when you preview your checkout page.
A Few More Tweaks
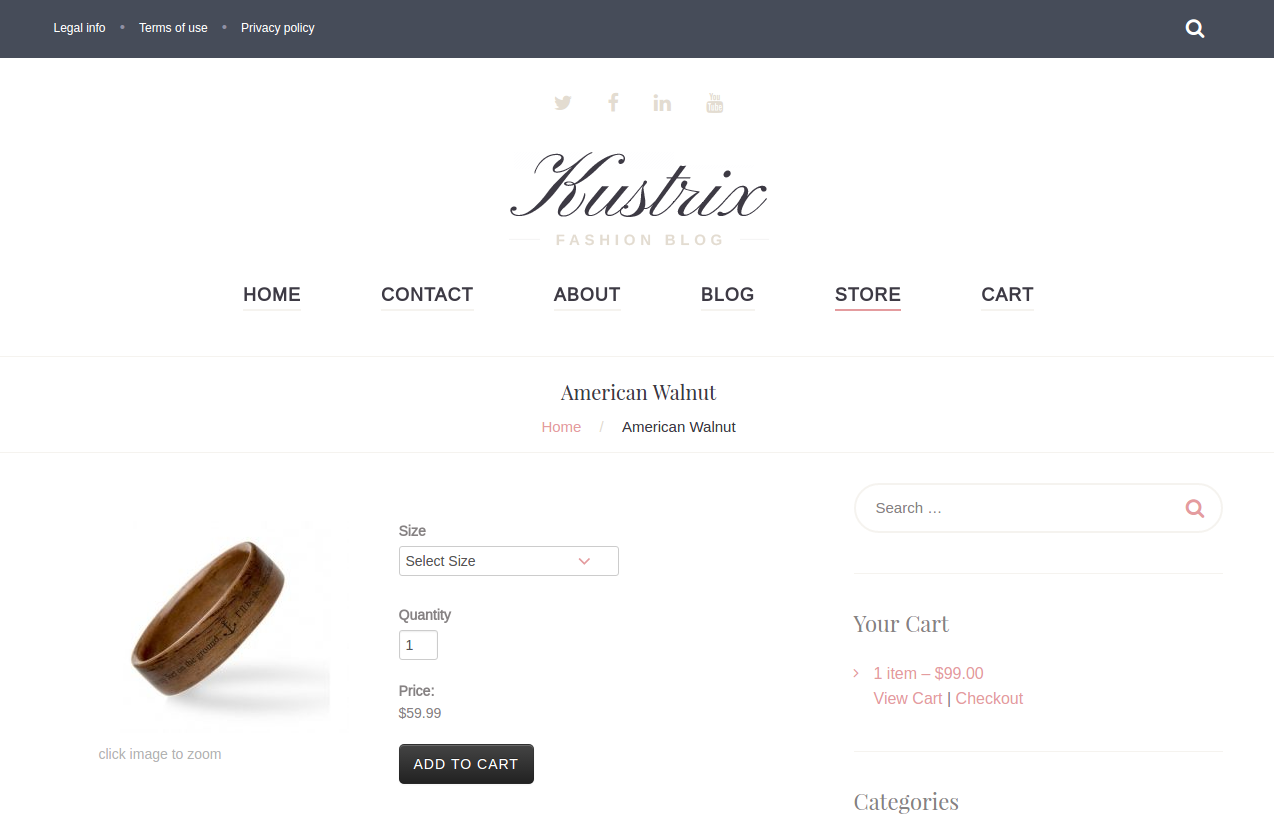
There are a couple other little things you can do to improve the overall look of things as well. One thing you might want to do is change the color of the Add To Cart buttons to better match your site. By default, all the Add To Cart buttons are green. The Kustrix theme doesn’t use green in its color pallet, so you can change the color of the buttons to black. This makes the product forms and Add To Cart buttons blend in better with the overall look and feel of your site.
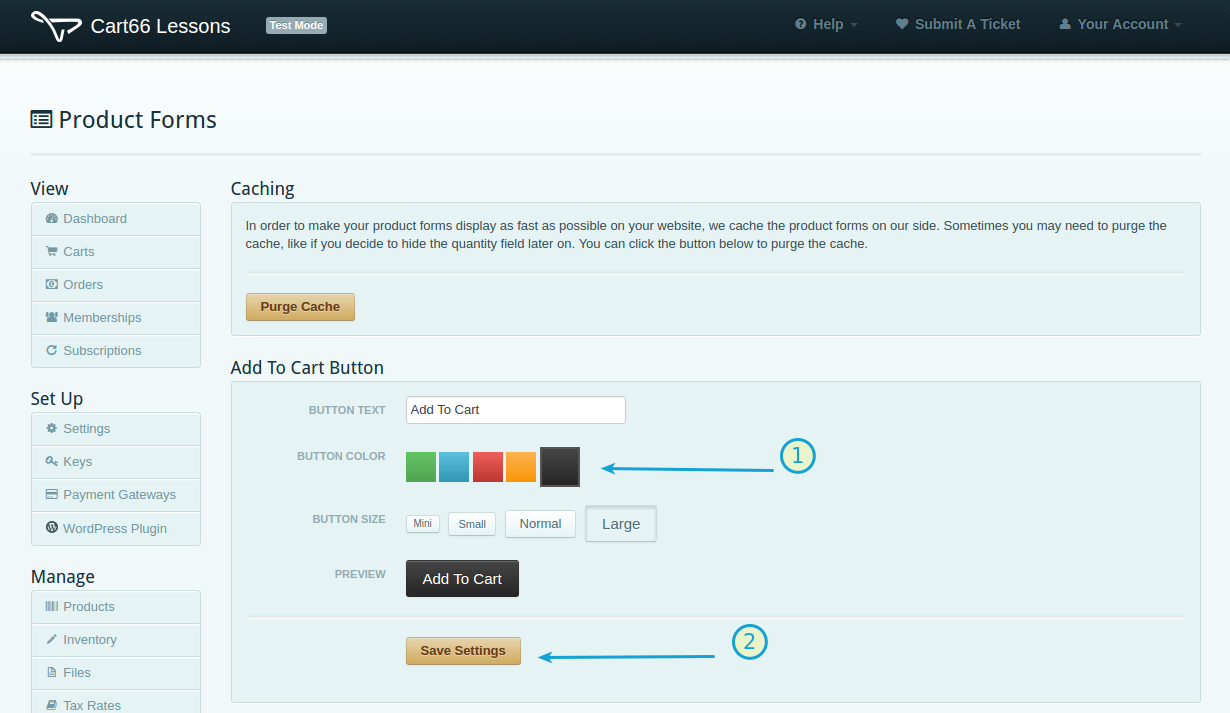
To change the color of the Add To Cart buttons, sign in to your Cart66 Cloud dashboard at https://manage.cart66.com and navigate to Customize > Product Forms. From there, select the black color swatch and save your changes.
CSS Tweaks
There are a couple CSS tweaks that will make the combination of the Kustrix theme and Cart66 even more seamless. The easiest way to add CSS to your site is to install the JP Custom CSS WordPress Plugin. This will give you a nice little panel where you can copy and paste the following CSS.
After installing and activating the JP Custom CSS plugin, in your WordPress admin, navigate to Appearance > Edit CSS and paste in the code below.
article.page ul li:before {
	background: transparent;
}

ul.cc-product-list li {
	padding-top: 15px;
	padding-bottom: 15px;
}

#comments {
	display: none;
}

#main .control-group .controls .cart66-select {
	line-height: 20px !important;
}
This CSS will hide the comments. If you want to show comments, just delete the #comments { ... } block of code.
More Kustrix Info
For more details on how to work with the Kustrix theme, take a look at the complete documentation for Kustrix. The documentation covers more details about installing and configuring the theme and all of its features.
If you like the way all of this turned out, you can upgrade to the premium version of the Kustrix theme to get even more features.
If there’s anything we can do to help you get ecommerce integrated into your site, please let me know.