An add to cart button is easy to create with Cart66 Cloud. With Cart66 Cloud you don’t have to worry about issues like PCI compliance and credit card security. The only things you need to think about are how much you want to charge and what you want to say about your product. All the other details like PCI compliance, credit card security, and payment gateway compatibility are all taken care of for you. Here is how easy it is to create a add to cart button sell your products with WordPress and Cart66 Cloud.
https://www.youtube.com/watch?v=5Adwth7sKzw
Create Your Product in Cart66 Cloud
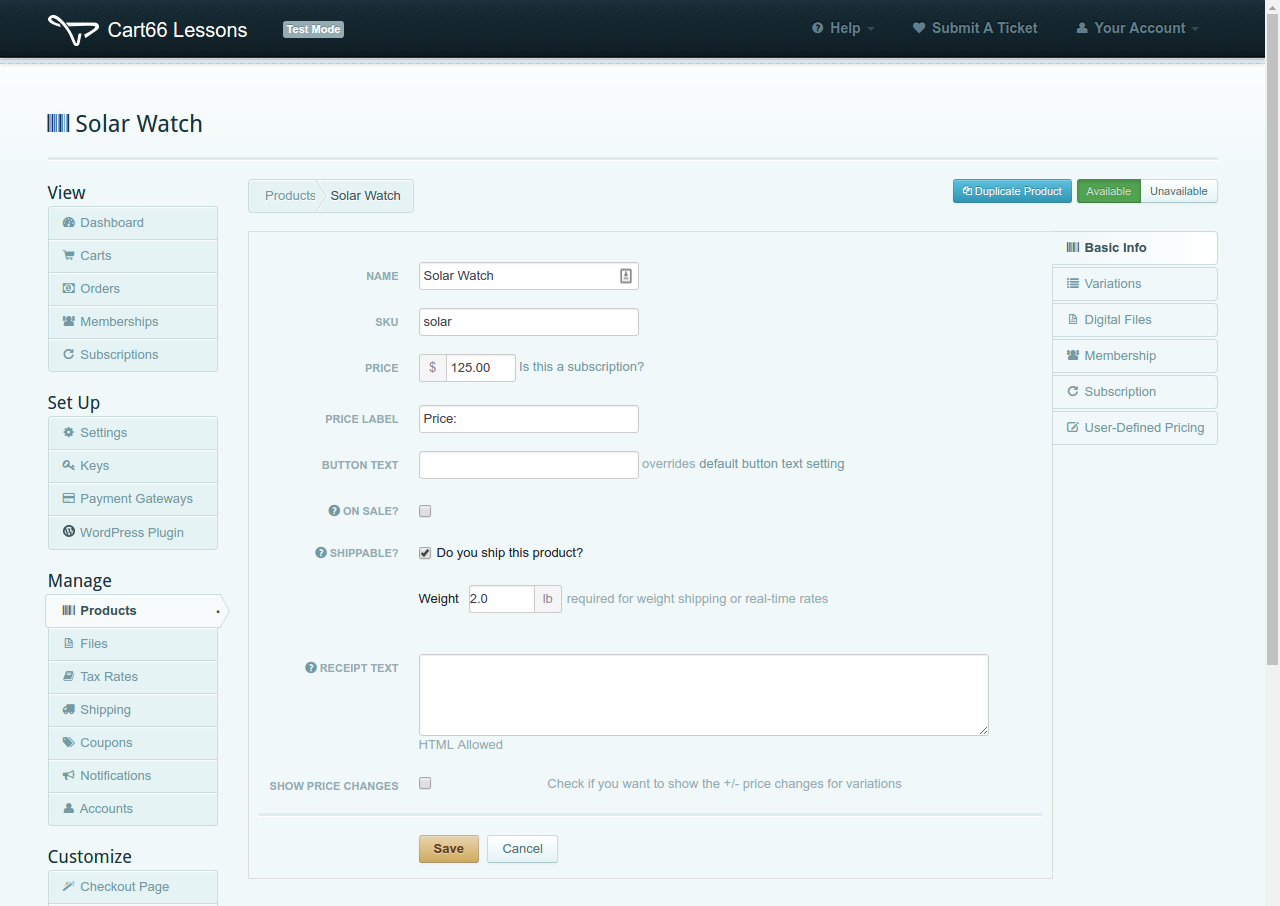
Suppose we want to create an add to cart button to sell a watch on your WordPress online store. The first thing to do is log into your Cart66 Cloud dashboard and set the name, SKU, and price for your product then click the checkbox to mark this as a product that you ship (as opposed to a digital product or service that doesn’t require shipping). There are several ways to charge for shipping. You can offer free shipping or charge based on weight or price. You can also set up real-time shipping rates. We’ll get into configuring shipping a bit later. There are bunch of other things you can also do like setup variations, set a sale price, or even include custom text in the customer’s email receipt when they buy this product. But all of that is icing on the cake. For now let’s just focus on setting up the WordPress add to cart button.
Quick Review:
– Create the Solar Watch product in your Cart66 Cloud dashboard
– Set the product name, price, and sku
– Select the checkbox to enable shipping

Push the product into WordPress
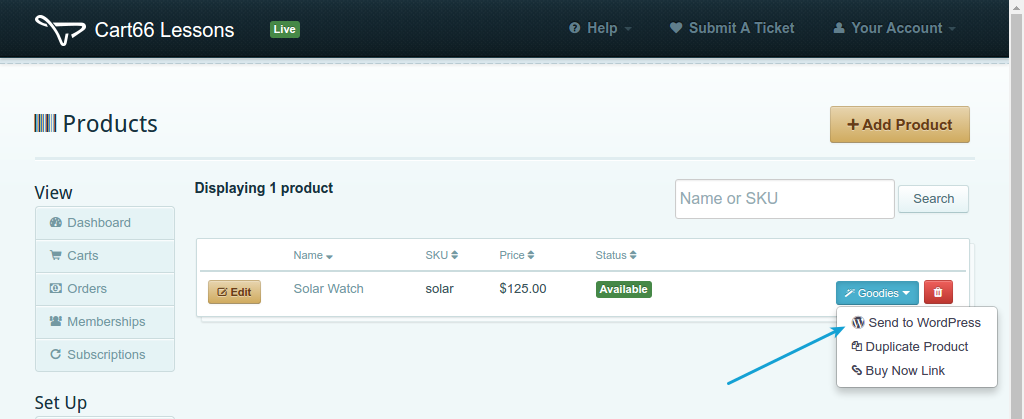
Got to the Products tab of your Cart66 Cloud dashboard and click on the Goodies button. Then click Send Product To WordPress. This will create a new product page for you in your WordPress site.

Add content
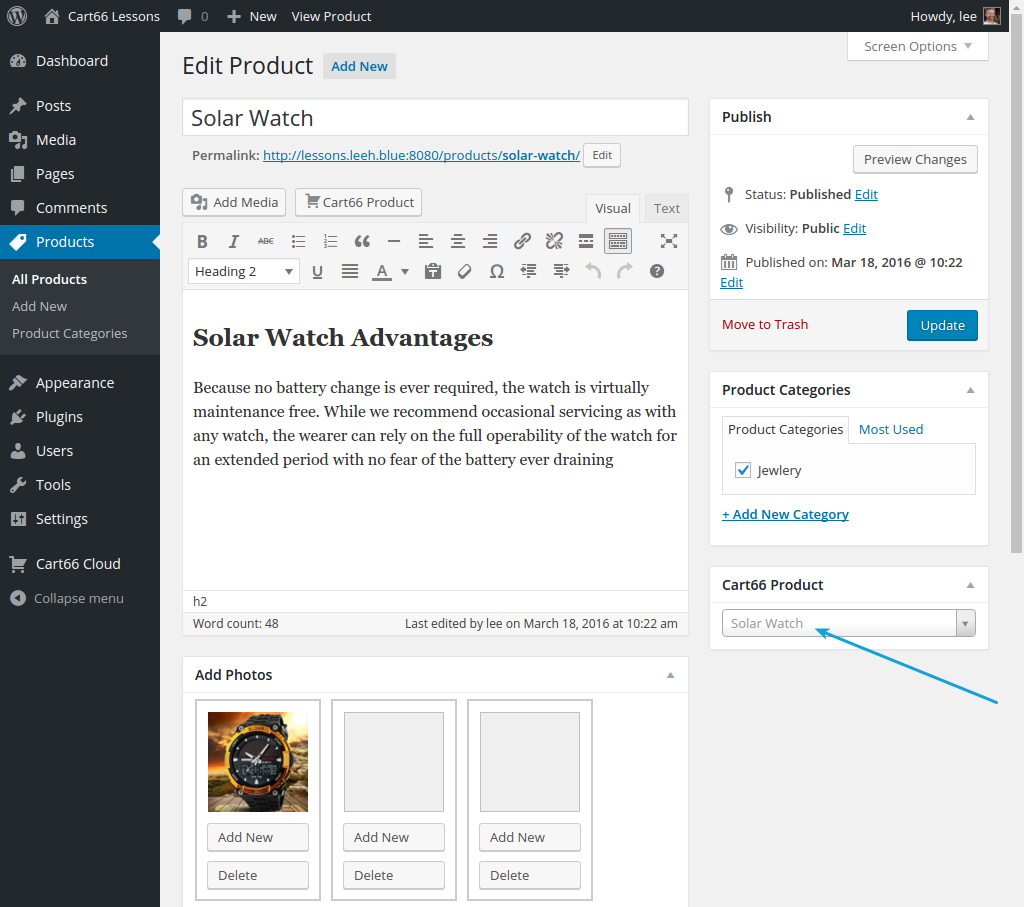
The last thing to do is just write a little content for your product. You can also add images to the built-in image gallery. Cart66 Cloud is aware of your theme and blends your product information and photo gallery into the theme you already have. So you don’t need a custom WordPress ecommerce theme.
Since we pushed the product into WordPress form your Cart66 Cloud dashboard, the product page is already linked up to the secured product information in Cart66 Cloud. If you had not pushed the product in from Cart66 Cloud all you’d need to do is select your product in the Cart66 Product select box.

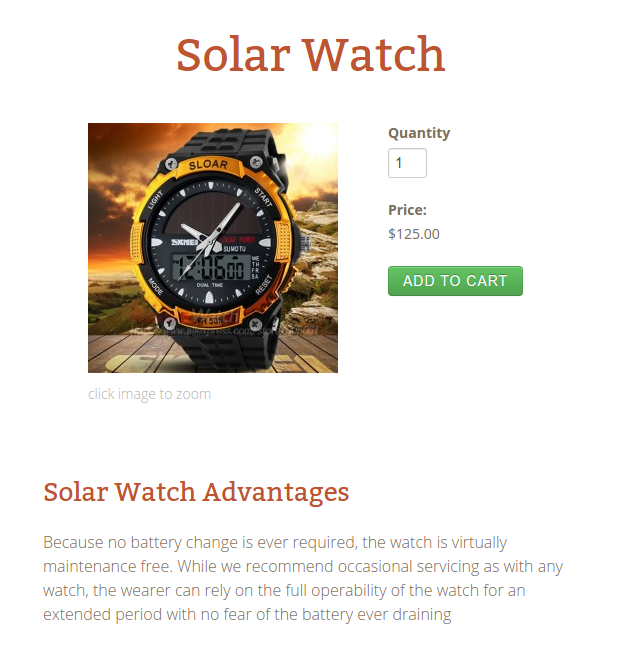
Add To Cart Button Complete
In conclusion, all you need to do to create WordPress add to cart button is:
- Create the product in your Cart66 Cloud dashboard
- Push the product into your WordPress site
- Decorate your WordPress product page with a description and maybe a couple images

Add To Cart Button Anywhere
If you just want to place an Add To Cart button on a page or post (or even a custom post type) that you already have. Here is a video on how to do that. You may want to see this post for full written description on how to place an Add To Cart button anywhere.
https://www.youtube.com/watch?v=Q7AJZq9DLwU
