https://www.youtube.com/watch?v=5qmvI9Jdv48
In this article, we’ll talk about how to sell WordPress maintenance plans and web hosting using Cart66. If you are a WordPress developer it is really helpful to have all your clients using the same hosting environment because that makes deploying and maintaining your sites easier. Also, you may want to let your customers sign up for a support and maintenance package as well. We’ll take a look at how to set all of that up so you can easily and automatically charge your customers every month for web hosting and support. Your customers will be able to save and manage their billing information in your secure customer portal.
What We Will Cover
- Creating web hosting / maintenance subscription products
- Optionally allowing your customers to select a support package
- Putting your web hosting plans on your website
- Customizing your payment page
- Customizing your secure customer portal
- Connecting your website to your customer portal
- Customers managing their billing information
Creating Web Hosting Subscription Products
Suppose you want to offer three different hosting packages to your clients as follows:
Spark Hosting
This will be our smallest and least expensive hosting package that we will sell for $15/month.
Ember Hosting
For our medium sized web hosting package, we will set up a plan for $25/month.
Fire Hosting
The largest plan we’ll offer will cost $45/month.
First, we’ll take a look at how to set up individual products for each of these web hosting plans. Then we’ll take a look at creating one product where we can collect additional information from our customer allowing them to:
- Tell us the domain name they want to use
- Choose which size plan they want
- Optionally select our support and maintenance service
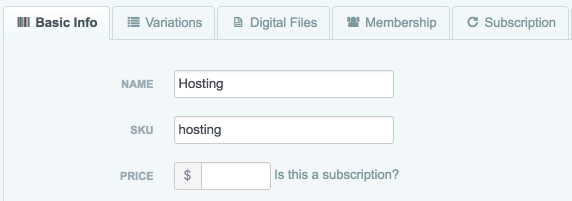
Let’s start by setting up your web hosting packages are subscription products in your Cart66 dashboard. Sign in to https://manage.cart66.com and navigate to the Manage => Products tab to create a new product. Provide a Name and SKU for your hosting product, then we’ll set up the subscription details.
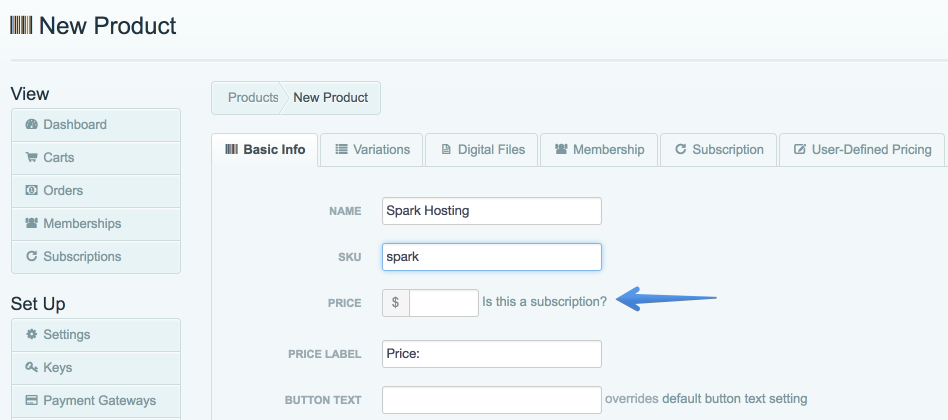
When you get to the price field, click Is this a subscription? to set up the subscription details.
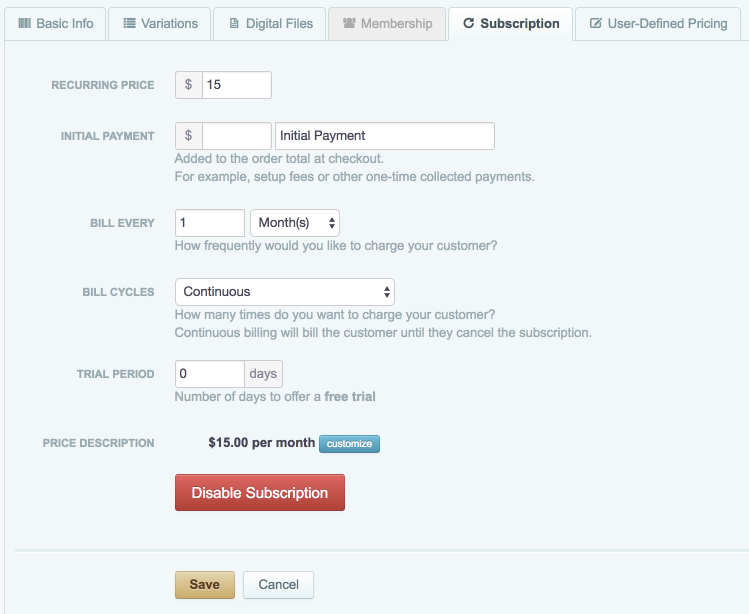
You have lots of freedom with how you’d like to set up the subscription. You can set the price, how often you’d like to charge (monthly, quarterly, annual, etc), whether or not you’d like to offer a free trial, and more. We’ll set up our subscription to simply bill the customer $15/month every month continuously until the customer cancels the account.
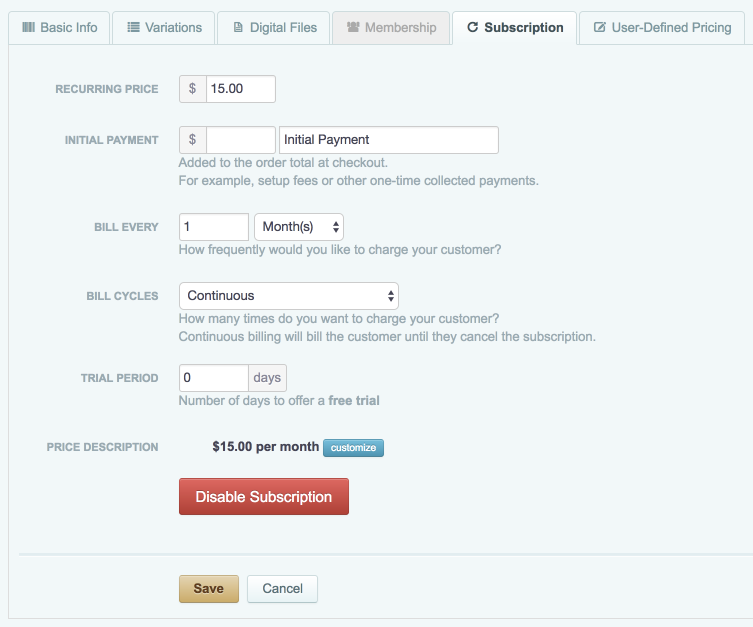
That’s all there is to it. The Spark Hosting plan is all set up.

In the exact same way, we can set up the Ember Hosting plan for $25/month and the Fire Hosting plan for $45/month. We will end up with three products for our three web hosting plans.

The main thing we want to take note of is the SKU for each of the three plans (spark, ember, and fire) because we will need that for the shortcodes we use in WordPress to sell these web hosting plans to our customers.
Selling Web Hosting Plans with WordPress
Now that we’ve defined the three web hosting plans we want to sell, let’s take a look at how we can list them on our WordPress website using Cart66. In this tutorial, I’m using a Genesis Theme called Minimum Pro Theme. I really like Genesis themes because they are fast loading and coded well. I like working with the widgets and, if you need to tweak anything, it’s easy to jump into the well-organized code and get stuff done.
So, let’s see about setting up the home page of our site to offer our three web hosting plans like this:

Genesis themes come with built-in CSS for displaying a grid – or multi-column layout. The CSS class for showing a three column layout is one-third which we can use like this:
<div class="pricing-options">

    <div class="one-third first">
	<h2>Spark</h2>
	<h4>$15/mo</h4>
	<ul>
	    <li>5,000 Monthly Visits</li>
	    <li>5GB Disk</li>
	    <li>250GB Bandwidth</li>
	    <li>SSL (included)</li>
	    <li>CDN (+$10/mo)</li>
	</ul>

    </div>

    <div class="one-third">
	<h2>Ember</h2>
	<h4>$25/mo</h4>
	<ul>
	    <li>10,000 Monthly Visits</li>
	    <li>10GB Disk</li>
	    <li>500GB Bandwidth</li>
	    <li>SSL (included)</li>
	    <li>CDN (+$10/mo)</li>
	</ul>

    </div>

    <div class="one-third">
	<h2>Fire</h2>
	<h4>$45/mo</h4>
	<ul>
	    <li>15,000 Monthly Visits</li>
	    <li>15GB Disk</li>
	    <li>1TB Bandwidth</li>
	    <li>SSL (included)</li>
	    <li>CDN (+$10/mo)</li>
	</ul>

    </div>

</div>
The main point to take away from this code example is the use of the Cart66 cc_product shortcodes. We have them set to:
- sku: The SKU of the product we want to display
- display: inline
- quantity: false (Do not show the quantity input field)
- price: false (Do not show the price)
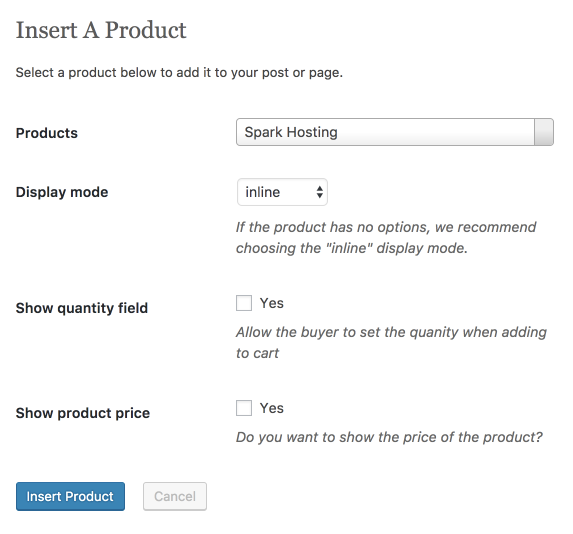
You don’t have to write the shortcode by hand. You can easily add a Cart66 shortcode anywhere on your site using the Cart66 button in the WordPress page editor toolbar.

Customizing The Button Text
By default, Cart66 buttons say Add To Cart, but we can easily change this for each button, or we can change the default text for all of our buttons.
To change the default text for all of your Cart66 buttons, navigate to the Customize > Product Forms screen in your cart66 Cloud Dashboard. Enter the text you would like to show on your Cart66 buttons in the Button Text field. You can also change the button color and size on this screen as well.

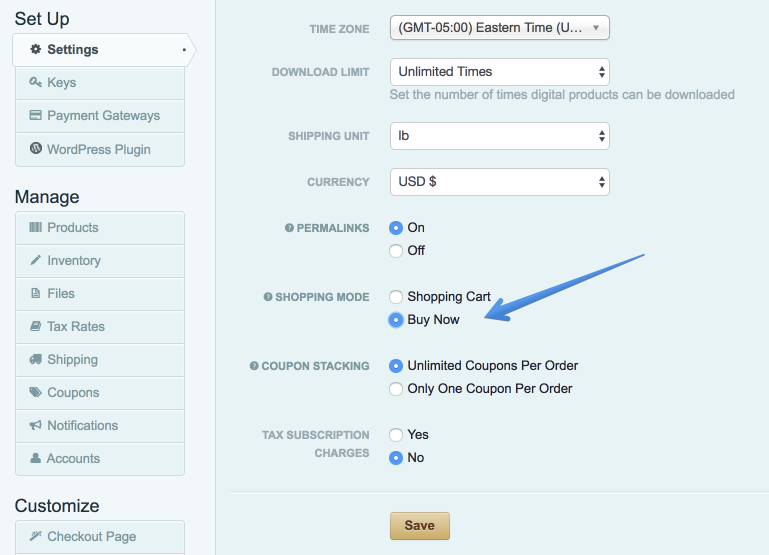
Buy Now Shopping Mode
Sometimes it is really nice to set your store so that customers can only buy one thing at a time, and this is one of those situations. We don’t want customers to add multiple web hosting plans to their shopping cart. So, we can set Cart66 to use Buy Now Shopping Mode.
Navigate to the Set Up > Settings screen and select Buy Now as the shopping mode. This will ensure customers only purchase one hosting plan at a time.
Customizing Your Secure Payment Page and Customer Portal
A great benefit of using Cart66 is that you get a PCI compliant, ultra-secure payment page and customer portal for keeping your customers payments and billing information safe. You can theme your payment page and customer portal with your own WordPress theme. Best of all, it is a one-click, easy process.
Navigate to the Customize > Checkout Page screen in your Cart66 dashboard. The WordPress URL will probably already be set for you from when you installed the Cart66 plugin. If it’s not, you can set that on the Set Up > Settings screen in the Store URL field.
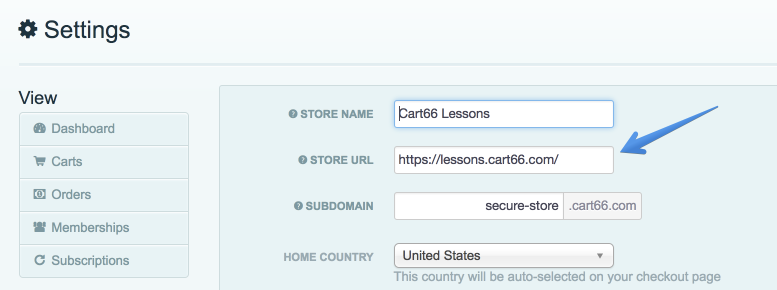
NOTE: This URL should be the root URL for your site, NOT a link to a specific page of your site.
Click the Slurp button and Cart66 will clone your WordPress theme and use it to theme your secure cart and checkout pages as well as your secure customer portal.
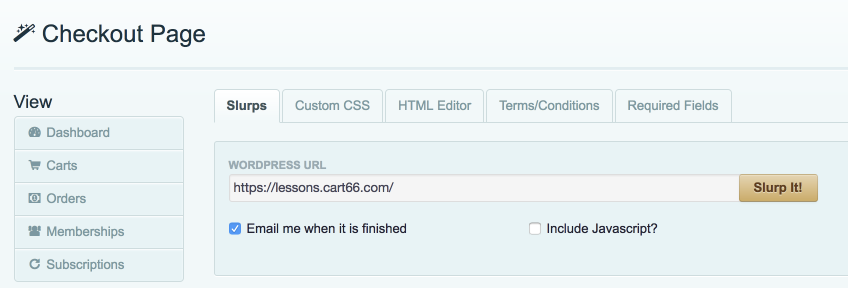
The slurp takes a couple minutes to complete and you will get an email when it is finished. Feel free to leave this page while it’s working. That’s all there is to it. When the slurp is completed, your secure cart, checkout page, and customer portal will all look exactly like the rest of your WordPress site.
Linking To Your Secure Customer Portal
Important: Install the Cart66 Cloud Members plugin. This plugin adds the settings for controlling the Member Homepage which is the page your customers see immediately after signing in to your secure customer portal. In this situation, we want our customers to see their Order History.
After installing and activating the Cart66 Cloud Members plugin, go to the Cart66 Cloud Members settings page and set the Member Homepage to Secure Order History.
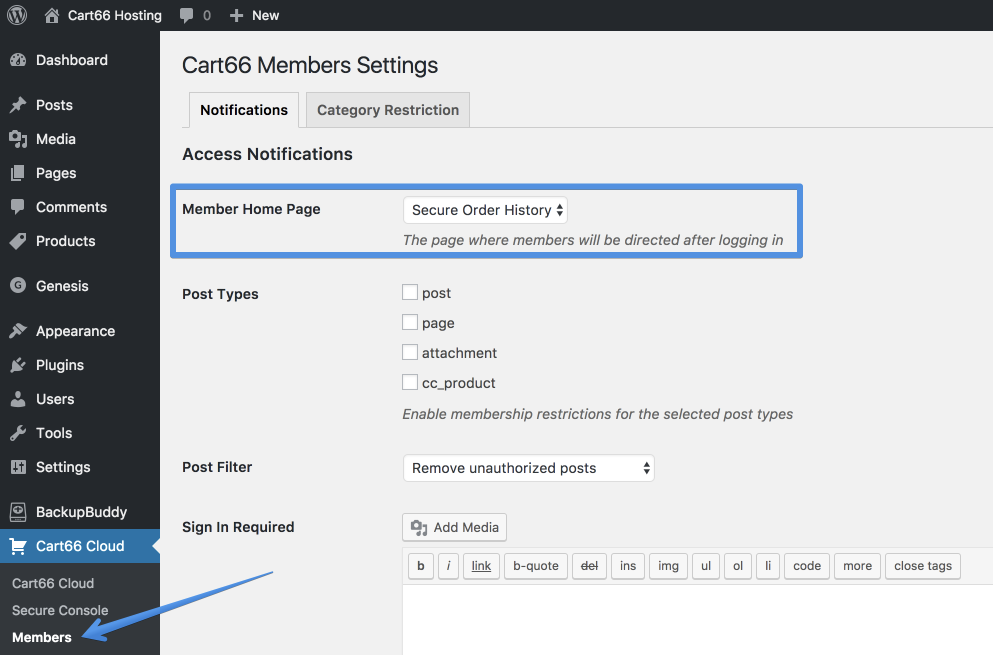
There are a bunch of other settings that you can configure if you are wanting to control access to premium content on your website. But all we want to do is let our customers see their order history and manage their billing information.
Adding A Sign In Link To Your Site
The Cart66 Cloud Members plugin comes with a few magic links built in. One of these links is /sign-in. This takes the user to sign in to your secure portal. You can put that link anywhere on your site. To add this link to you WordPress navigation, go the the Appearance > Menus screen and at it as a Custom Link like this:

After adding that link to the menu and saving the menu, the Sign In link will be in your WordPress site’s navigation.

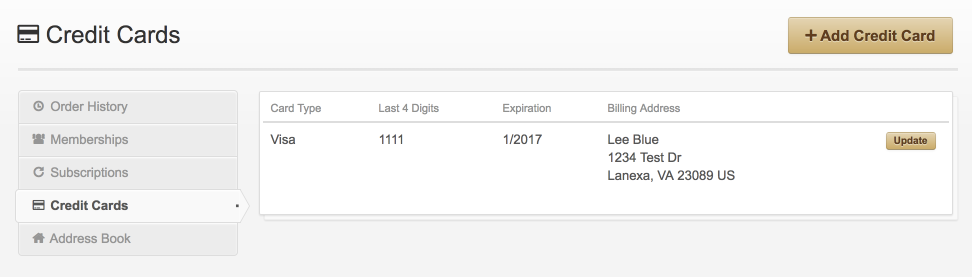
When your customers click that link they will be taken to the secure customer portal where they can sign in and manage their billing information.
Once signed in, you customers can update their credit cards, cancel their subscriptions, and manage all of their information.
Selling A Support and Maintenance Plan
Instead of having three different products and three different buttons to sign up for hosting, you might want to have a single form where your customer can select the hosting plan they want from a drop-down menu. Moreover, we might want to collect additional information from the customer like the domain name they want to use and whether or not they want to sign up for our support and maintenance plan.
Let’s make a form that looks like this:

Product Settings
This product has three variations:
- Domain name: A single-line text field
- Hosting Plan: A drop-down list of our hosting plans
- Support package: An optional add-on item for WordPress maintenance
Setting the Name and SKU
Like our other products, we start be setting the Name and SKU for the product, but we’ll give this product the generic name Hosting because the details of which hosting package will be specified in the Hosting Plan select box.
The Subscription Details
For the subscription, set the Recurring Price to $15 which is the price of our least expensive hosting plan, the Spark Hosting plan. This will be important as we start adding the variations for the three hosting plans we offer. We will leave all the other settings at their default values for continuous billing and no free trial.
Get The Domain Name
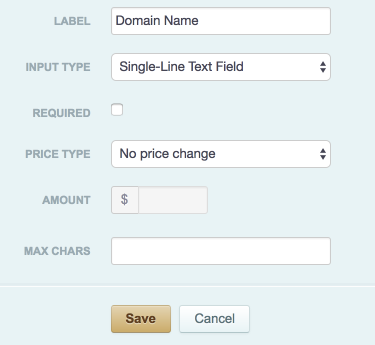
Our form will have a text field where the customer can enter the domain name they’d like to use.
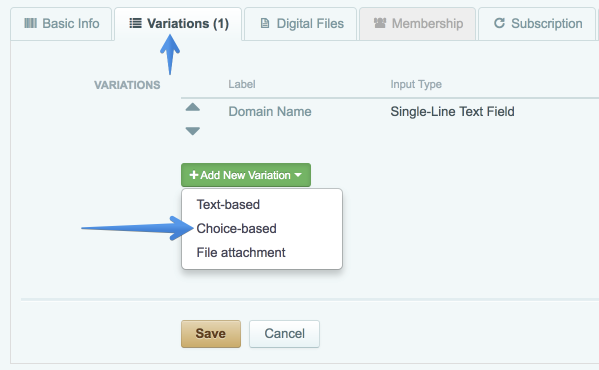
Click Variations > Add New Variation > Text Based. Then you’ll see a screen to enter the information for the text field.
Sell Web Hosting Plans As Product Variations
Next, we’ll set up three variations for the hosting plans. The first hosting plan is for our Spark Hosting plan wich is $15/month – so that does not change the price of the product since we set up the subscription to be $15/month.
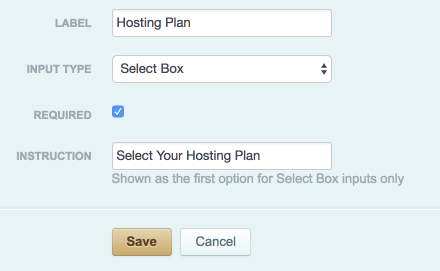
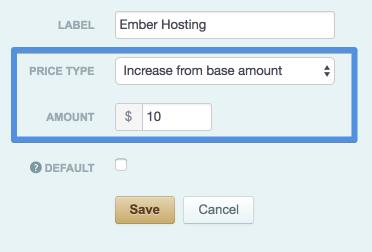
Now we specify the label and input type. We also set the default value for the select box with a brief instructional message.
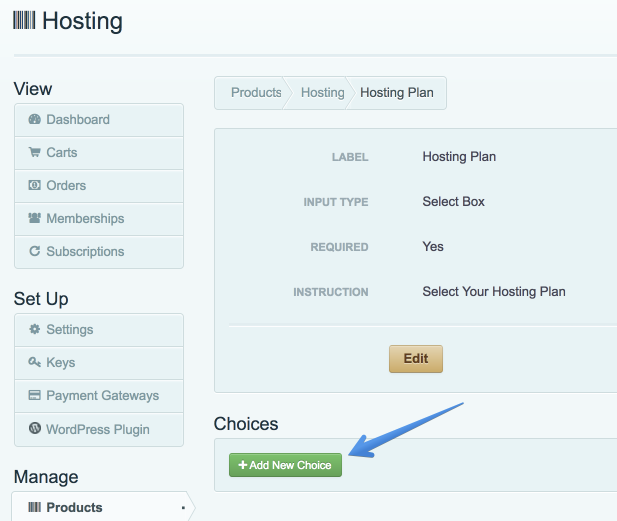
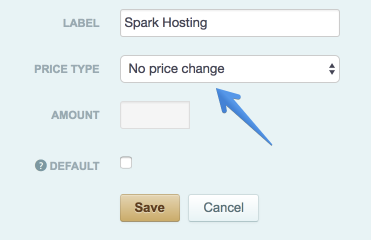
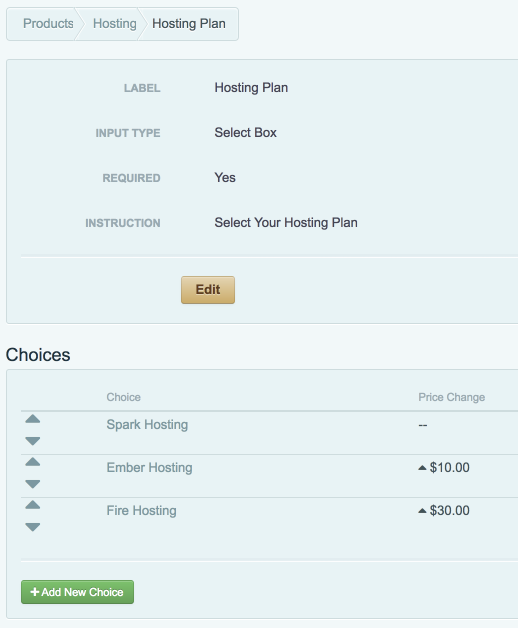
Next, we add the choices to the Hosting Plan field. We’ll add on choice for each hosting plan starting with the Spark Hosting plan for $15.
We set the default subscription to be $15/month which is the price we want to charge for Spark Hosting. So there is no price change for this plan.
The Ember plan is $25 per month which is $10 per month more than the $15 per month price on our base subscription. So we want the price of the subscription to increase by $10 per month when the Ember Hosting plan is selected.
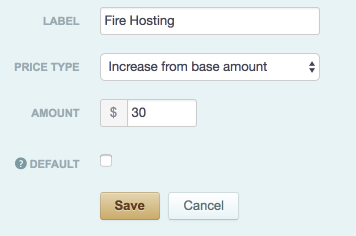
The Fire Hosting plan is $45/month which is an increase of $30/month over the base subscription price of $15 per month. So, if the customer selects this hosting plan, we want the price to increase by $30 per month.
After creating these three options, you will have the choices set up like this:
Selling WordPress Maintenance and Support
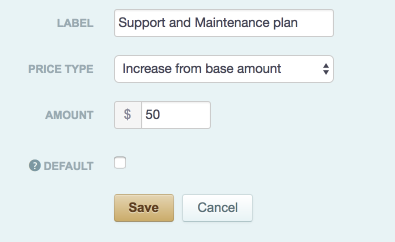
The final thing we want to add is the ability for our customers to sign up for our WordPress Support and Maintenance plan. We’ll make this an optional add-on for the product and we’ll charge $50 per month for it. Since it is optional, we’ll set it up as a checkbox element in the product form.
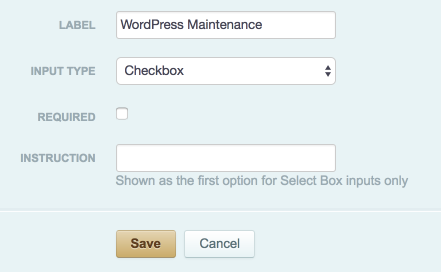
We only need one checkbox for this because people will either want the support plan or they will not. If they do, then we want to charge an additional $50 per month.
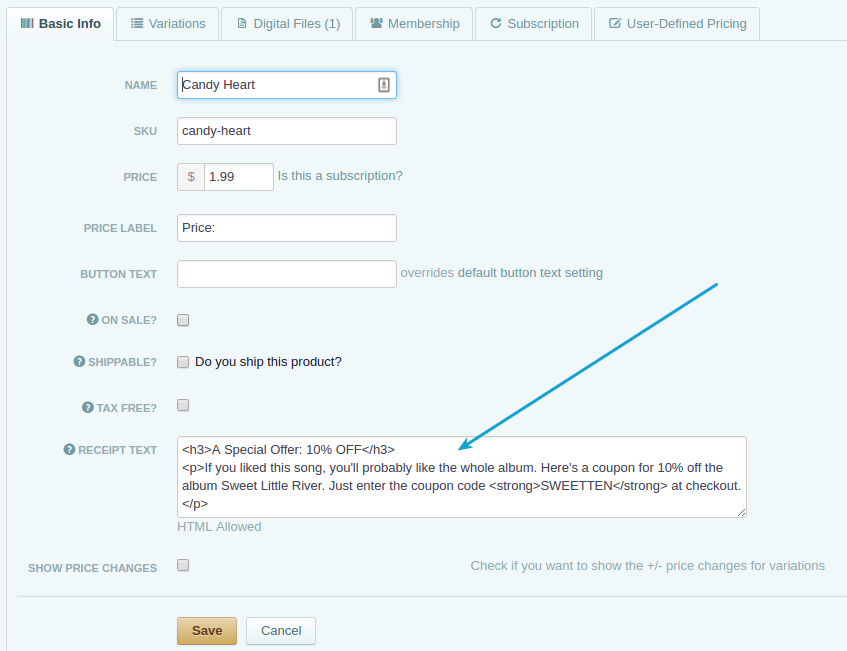
Custom Receipt Text
One final enhancement we can make is to include some instructions for our customers so they know where they can update their credit cards and manage their accounts. You can add some custom text to the receipt with they purchase the hosting plan.
Still Have Questions?
If there’s anything we can do to help you get your site setup, please let us know.